• Skip to primary navigation
  • Skip to main content
  • Skip to primary sidebar
  • Texas A&M Forest Service
  • Texas A&M Veterinary Medical Diagnostics Laboratory
  • Texas A&M AgriLife Extension Service
  • Texas A&M AgriLife Research
  • Texas A&M College of Agrculture and Life Sciences
Ellis County Master Gardener Association
Ellis County Master Gardener AssociationTexas A&M AgriLife Extension Service
  • Facebook
  • Menu
  • Home
  • About Us
    • 2026 Ellis County Master Gardener Officers
    • Become An Ellis County Master Gardener
  • What’s Happening
    • Ellis County Master Gardener Calendar of Events
    • E-Gardening Newsletters
    • Check It Out!
    • What’s Happening
    • Things to Do
      • Lawn and Garden Expo
      • Farmer Markets in Ellis County
    • Scholarships
  • Blogs
  • Resources
  • Members Only
    • Volunteer Opportunities
    • Continuing Education
    • Member Directory
    • 2025 ECMG Committee Information
    • HoeHums
    • Forms & Official Documents

It’s been 20 Fabulous Years of Ellis County Master Gardeners Calendars

December 31, 2025 by elliscountymastergardeners

The anniversary edition of the ECMG calendar is now available, marking a 20th year milestone. It’s chalk full of monthly gardening checklists, timely advice, moon phases, holidays, community happenings, and rainfall statistics. You can pick up your copy at sponsoring businesses or at events where the Master Gardeners are present, such as farmers markets in Waxahachie, Midlothian, and Ennis or the Ellis County Master Gardeners Expo.

For the past 2 decades, the Ellis County Master Gardeners have published a calendar packed with valuable guidance for local gardeners. Each year, about 5,000 copies are printed and distributed to gardeners throughout Ellis County — that’s almost 100,000 calendars since its inception.

The idea for the calendar came from Pam Daniel during her first year as a Master Gardener. She saw the need for resources to advance the mission of providing horticultural education in the community and believed a printed calendar was an ideal solution. Thanks to Pam’s initiative, a committee was formed to create the calendar, which involved various duties such as finding sponsors, collecting details on local events, and researching and writing articles. The calendar’s success is evident both in its popularity among Ellis County residents and in its receipt of two state-wide awards for educational content. Pam has remained on the committee since its beginning. Other long-serving committee members include Linda Ballard (since 2011), Sheila Cloonen (since 2015), and Scotty Rigsby (since 2017).

The continued success of the calendar of more than 20 years is thanks to our generous sponsors. Their support allows us to offer calendars at no cost to local gardeners. Several businesses have supported the calendar every single year: The Greenery, Travis Equip. Co., Tex-Scapes, Boyce Feed & Grain, and Pam Daniel, REALTOR®. When you visit these sponsors, please thank them for their ongoing commitment!

By Donna Summerlin, ECMG

See the January What To Do In The Garden page:

Filed Under: Informative Resources, Newsletter, This Month In The Garden, What to do in the Garden

Summer Perennials – From an Old Cemetery to My Garden

June 29, 2025 by elliscountymastergardeners

For the Fourth of July in my garden, red will come from roses, but the white and blue will be from two of my favorite salvias, “Henry Duelberg” (blue) and “Augusta Duelberg” (white).  Both are varieties of Salvia farinacea.

They came to my yard from a nursery, but they arrived at nurseries through a plant treasure hunter worthy of Indiana Jones’ hat, Dr. Greg Grant, horticulture extension agent for Smith County.  He has a habit of finding forgotten or unknown varieties of plants that become stars of Texas gardens.  He found the Duelberg salvias while searching for populations of another native salvia.

Dr. Grant likes to search in places where plants aren’t well tended to find varieties that will grow even in neglected gardens.  The Duelberg salvias were found in an old, rural Central Texas cemetery that lacks an irrigation system.  He found them on a hot, dry summer day when they didn’t look great but were living despite the lack of care.

He searched for an identification of the unknown salvias, but they were unlike others, so he named them after the graves they adorned and introduced them to nurseries.

Dr. Grant’s theory is that perhaps one of the Duelbergs was a dabbler in salvia breeding and that after their deaths (Augusta died in 1903 and Henry in 1935) someone put the parent plants at the heads of the graves where they reseeded and thrived ever since. 

They certainly thrive in my garden where I only water them every 3 to 4 weeks in the summer.  They like my black clay soil (amended on planting with a little compost).  Pollinators like them in turn.  I find that the blue “Henry Duelberg” salvia grows around 3 feet tall and, due to my windy yard, tends to sprawl over.  I solved this with a tomato cage that I leave over the plant. It grows with rock rose, which makes a pretty pink contrast to the blue.

My “Augusta Duelberg” is just an inch or so shorter but doesn’t fall over so easily.  It is in a bed with milkweed and a white rose.

“Henry Duelberg” salvia is a Texas Superstar selection.

by Marj McClung, ECMG

Filed Under: Editorial, Newsletter, This Month In The Garden Tagged With: Duelberg

July Planning for a Fall Garden

June 29, 2025 by elliscountymastergardeners

We get lots of encouragement to garden in the spring. It seems like every store is full of plants and gardening tools. Not to mention everything around you is coming alive and it’s not crazy HOT yet.

But in the summer, when every store does not have a rack of plants by the front door and nobody is encouraging you to garden, you can still plant a garden. You can have a fall garden. If you haven’t tried this yet, I encourage you to give it a chance. I have had a fall garden for the last 4 years and while I am by no means a seasoned professional, I have learned a few things from my successes and failures. I am always researching for better practices. There is lots to learn, but it is very rewarding.

First, consider what to start indoors (indirect sowing) and what to plant outdoors (direct sowing).

Here are some of your parameters:

  • You need to know when your average first frost date is going to be. Our area’s average first frost date is November 15. Remember this is an average.
  • You also need to know your plant’s days to maturity. This is most important with your plants that are NOT frost proof. Note to self: the days to harvest begin when your direct seeded plants come up or when your move your indirect seeded transplants outside. 

If you have the room in your outdoor garden, you can start these warm season veggies in July and August: black-eyed peas, Southern peas, winter squash, pumpkins and okra. These are heat-tolerant plants; just make sure you plant them early enough to beat that first frost date. For example: a pumpkin that matures in 90 days is going to need to be up and growing by the
August 1. That will give you August, September and October with a 2-week fudge-factor before the likely first frost.

Conversely, cool season crops like the brassicas (think broccoli, Brussels sprouts, cabbage and cauliflower) won’t sprout well in the heat; so, start these indoors where you can control the temperature. You will be starting them 6 to 8 weeks before you put them outside, so think about putting them out during the first couple of weeks of September. (Eight weeks before that date is around the third week of July.) Cool-season plants can tolerate a light frost. In fact, some say they get better tasting after a light frost. You might also start some zucchini or summer squash. These aren’t exactly cool-season crops, but you will be avoiding the worst of the insect pressure by growing them indoors until it is cooler. (I tried direct sowing zucchini last year and still got squash vine borers, but I will try indirect sowing this year and transplant them a little later. I might have to protect them from frost at the end.)

Then you have your root crops, which are better suited for direct seeding after the heat breaks. Carrots, radishes, beets and onions fall into this category. Most of these seeds don’t do well with transplanting. The fun thing about these crops is they are much more tolerant of the cold. Lettuce and kale can be in this “plant after the heat breaks” category, too, even though they will be more susceptible to freezes; their days to maturity are also quite low. So, you should get a harvest.

So, what are you waiting for? Get planning! Get planting! Not everything will be perfect, but the best gardens are the ones that teach you new things.

I have included below a spreadsheet prepared by Marj McClung, ECMG. It lists a wide variety of vegetables with their planting dates and days to maturity. You can download it by clicking and saving it to your computer.    Fall Planting Guide North Central Texas


by Kim Rainey, ECMG

Filed Under: Ask A Master Gardener, Editorial, Newsletter, This Month In The Garden, Uncategorized Tagged With: what to do in the garden

Planting a Bare Root Persimmon

January 31, 2025 by elliscountymastergardeners


It’s December, and by this or next month, it’s time to plant bare-root trees, especially fruit trees. Here’s how I planted a persimmon, though the technique will be similar for other trees.

Selection:

  • Check that your tree canopy will not impinge on other trees, the house, the neighbor’s property, etc. after it has grown to full height and width.
  • Check that the tree is appropriate for the climate zone you are For Ellis County, this is zone 8A. Many advise buying a tree hardy to zone 7 because as people who have been here a few years have experienced; our weather can get into single digits for several days straight.
  • Persimmons in particular come in two major categories: astringent and non-astringent. The former has to be picked fully ripe and is best frozen and scooped out, to avoid a pucker factor in the flavor. Non-astringent varieties can be eaten at a less full level of ripeness.

Mail order nurseries. I ordered from a mail-order nursery, WomackNursery.com. Womack Nursery is about two hours west of Waxahachie. It has cultivars that you can’t easily get near Waxahachie. If you can find what you want locally in a pot, do so. It will be a little easier to grow and you’ll be able to plant it in other seasons besides winter. However, I could not find anything at the time at a local nursery.


Here are the steps I used:

  1. I received notification of the expected delivery time, so I dug a one-foot-deep by a couple-foot wide hole in our black clay soil, cleared my schedule, and got ready to plant. The clay I pulled out, I broke up into as small fragments as possible, to avoid air I also tested the hole for drainage by filling the hole with water. If it drains within 24 hours, it would be satisfactory for planting. Greater than 48 is unacceptable. In between is a judgment call based on what you can find out about the tree’s tolerance for wet soil.
  2. When the tree arrived, I received something that looked like a tuning fork, with the stem pointing up and two thick roots pointing down parallel to each other, with the trunk going up from where the roots joined.
  3. This got me scratching my head about where the soil level should There was a point where the trunk thickened near where the junction of the roots occurred. I took that to be the beginning of the root flare and set my soil line at or just above the junction of the roots with the trunk.

Note: Some sources say to put the soil line just below the grafting junction. This could be wrong depending on where your tree is grafted. In my case, the grafting junction was several inches above the root flare.

  1. I adjusted the depth of the hole, only digging wide enough so that there would be room to comfortably refill with soil while tamping down the soil to get air bubbles out. I also had a mound of soil in the center of the hole, where the base of the tree could rest and the roots branch out..
  2. With a helper holding the trunk upright and the roots standing on the shale I put at the bottom, I filled the hole with soil and water, periodically lightly stepping on the soil to eliminate air pockets.
  3. I put several inches of mulch over the soil, not letting the mulch touch the trunk, put a wire fence around the tree to keep the dog from digging, and I was done.
  4. Some people counsel topping the trunk of a bare-root fruit tree as low as a couple feet. This starts the canopy at a lower point to make picking easier, as well as to encourage root I did not do this, the tree being a variety that will not grow too big in the first place.

Post planting care. One does not ordinarily fertilize a bare root planting at the time of planting. I periodically watered, sticking a finger into the soil to determine where the soil was moist. If it was dry an inch down, I would irrigate using a soaker hose.

The first year, it took well into May for the first growth to appear after planting in December. I read that this is typical for bare-root persimmons. So be patient!

Why did I choose persimmon? The fruit is delicious, generally unavailable at the supermarket, with fruits ripening to a colorful orange. You can harvest after the leaves have fallen, making it look like it has Christmas tree ornaments!

Other fruit trees with unusual or expensive fruit that grow easily in Ellis County include figs and pomegranate.

by Paul Thomas, ECMG

Filed Under: Ask A Master Gardener, Newsletter, This Month In The Garden, Uncategorized, What to do in the Garden

Garlic, Anyone?

September 30, 2024 by elliscountymastergardeners

It’s only October, but it’s the perfect time to start talking garlic, especially growing them because they are planted in the autumn for a late spring harvest. In North Texas, garlic is typically planted by mid-October or at least 4 to 6 weeks before the ground freezes. A gardener should be able to buy seed garlic at local nurseries and garden centers and online (in a pinch, even grocery store garlic will work).

Meet the hardneck and softneck
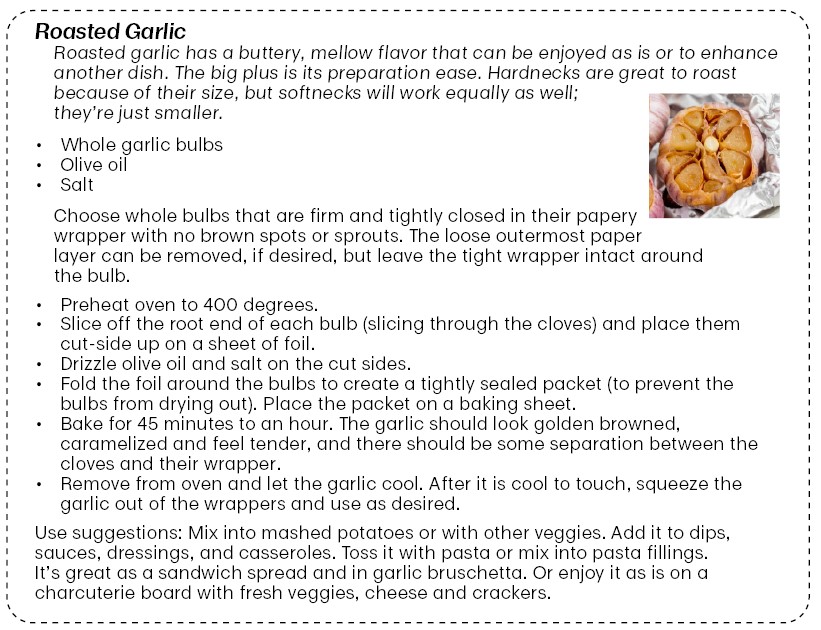
Before purchasing any garlic, it’s useful to know that it is distinguished by two general types identifiable by the bulb’s stalk or what is called the neck. Softneck stalks remain soft through maturity. They are easy to braid but the cloves are smaller and softer. Hardnecks, as its name implies, has a stalk that will become rigid at maturity. It will have fewer, but larger cloves per bulb – excellent for roasting.

Hardnecks and softnecks have other differences, too, that will likely influence the planting choice. Softnecks are milder in flavor while hardnecks are “hotter,” more robust. Softnecks also store well for a longer period than hardnecks.

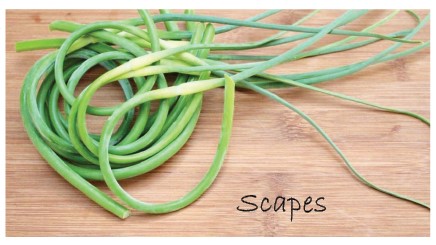
However, hardnecks have a bonus over softnecks – they produce scapes. Scapes are tender, tasty shoots that if grown unchecked will eventually form into flowers and seeds. They can be eaten raw or cooked and have a mild garlicky flavor. (Garlic scape pesto is a delicious treat.) Plus, by removing scapes before they form flowers allows the garlic to put its energy into bulb growth. You can expect scapes about a month before the bulbs are ready; they’ll be easy to recognize because as they grow, they’ll curl.

As to climate, softneck garlic grows better in our growing zone with mild winters and hot summers. Hardnecks need a period of cold for proper development. If the winter is too mild, only a single clove may grow, instead of several.

Growing garlic
Garlic prefers light and loose soil and lots of sunshine. Clay soils need to be amended with compost. Alternatively, a raised bed or container will easily work. Make sure the garlic will receive 6 to 8 hours of sunshine.

Break bulbs apart to plant the cloves, but do not remove the tight papery skin covering each one. Plant the cloves about 2 inches deep with the root end (flat end) down, pointy tip up. Space them about 5 to 9 inches apart. Mulch with straw or leaves to protect the cloves through winter. Now, you can forget about them until the spring.  Tip: before planting, separate the cloves by size. Plant only the best, largest ones and cook the little ones.

In the spring when the garlic starts actively growing, fertilize them with a nitrogen-rich fertilizer (e.g., compost, blood meal, feather meal, etc.) and keep the garlic well-watered throughout the spring.

By mid-May to early June, the garlic will be ready to harvest. Specific harvest timing is dependent on the garlic type. A reliable sign is when three or four bottom leaves turn yellow/brown while the rest are green. Harvest the garlic while there are still some green leaves, so the paper-like skin remains on the bulb. To harvest, pull the bulb – stalk, roots and all – out of the soil. If the soil is tight, carefully loosen it first before lifting the bulb out.

Now it’s time to “cure” the garlic bulbs. Gather them into bunches, tie the stalks together and hang them in a well-ventilated place out of direct sunlight for 3 to 6 weeks. A garage, closet or even a covered porch should work well. The garlic is ready when the stalk is completely dried out. Snip off the stalk and you’re ready to start cooking. And don’t forget—save some cloves for the next fall’s planting.

Use suggestions: Mix into mashed potatoes or with other veggies. Add it to dips, sauces, dressings, and casseroles. Toss it with pasta or mix into pasta fillings. It’s great as a sandwich spread and in garlic bruschetta. Or enjoy it as is on a charcuterie board with fresh veggies, cheese and crackers.

By Teresa Brown, ECMG

Filed Under: Ask A Master Gardener, Newsletter, Recipes, This Month In The Garden, Uncategorized

Should You Consider a Fall Garden?

July 30, 2024 by elliscountymastergardeners

Most gardeners get the “garden bug” in the spring when they see vegetable seedlings show up in big box stores or their local garden centers. This is great if you want your veggies ripening up in late spring or early summer, but once the Texas weather heats up your garden will probably not produce very well. Tomatoes, for example, do not set new fruit when the daily temperature gets over 85 degrees. Insect pests like squash bugs come out in the spring and their hundreds of offspring can destroy your squash and other vegetables in a few days. However, some veggies and herbs do very well in the summer heat if they get sufficient water: chilies, okra, basil, rosemary, and oregano.

But good news! Texas has a long growing season and here in North Texas the average first frost is November 15, so you can have a second garden. Squash actually does better in the fall because squash bugs only have one cycle in spring and early summer. Many fall veggies can withstand a light freeze, and I have seen winters where there isn’t a freeze until late January. The trick is knowing what vegetables to consider and when to plant them.

Got you thinking?

Below are some vegetable suggestions and a link to a fall planting guide for those details that you will need.


Plant                            Suggested planting date          Frost tolerance

Bush snap beans                       Sept 1                            —                                   

Broccoli                                     Sept 1                            FT

Brussels sprouts                        Sept 1                            FT

Cabbage                                    Sept 1                            —

Carrots (seeds)                          Nov 10                           FT

Cauliflower                                Sept 1                            FT

Cucumber                                  Sept 1                            —

Garlic                                         Oct 1                              FT

Squashes                                   Sept 10                          —

Turnips                                      Nov 1                             FT

Sweet corn                                Aug 20                           —

Pumpkin                                   Aug 1                             —

This link will take you to the Texas A&M Agrilife Extension Service publication “Fall Vegetable Gardening Guide for Texas” to get full details

https://agrilifeextension.tamu.edu/browse/featured-solutions/gardening-landscaping/fall-vegetable-gardening-guide-for-texas/

Article submitter by Rob Franks, ECMG

Filed Under: Ask A Master Gardener, Editorial, Newsletter, This Month In The Garden

The Magic of the Lotus

March 30, 2024 by elliscountymastergardeners

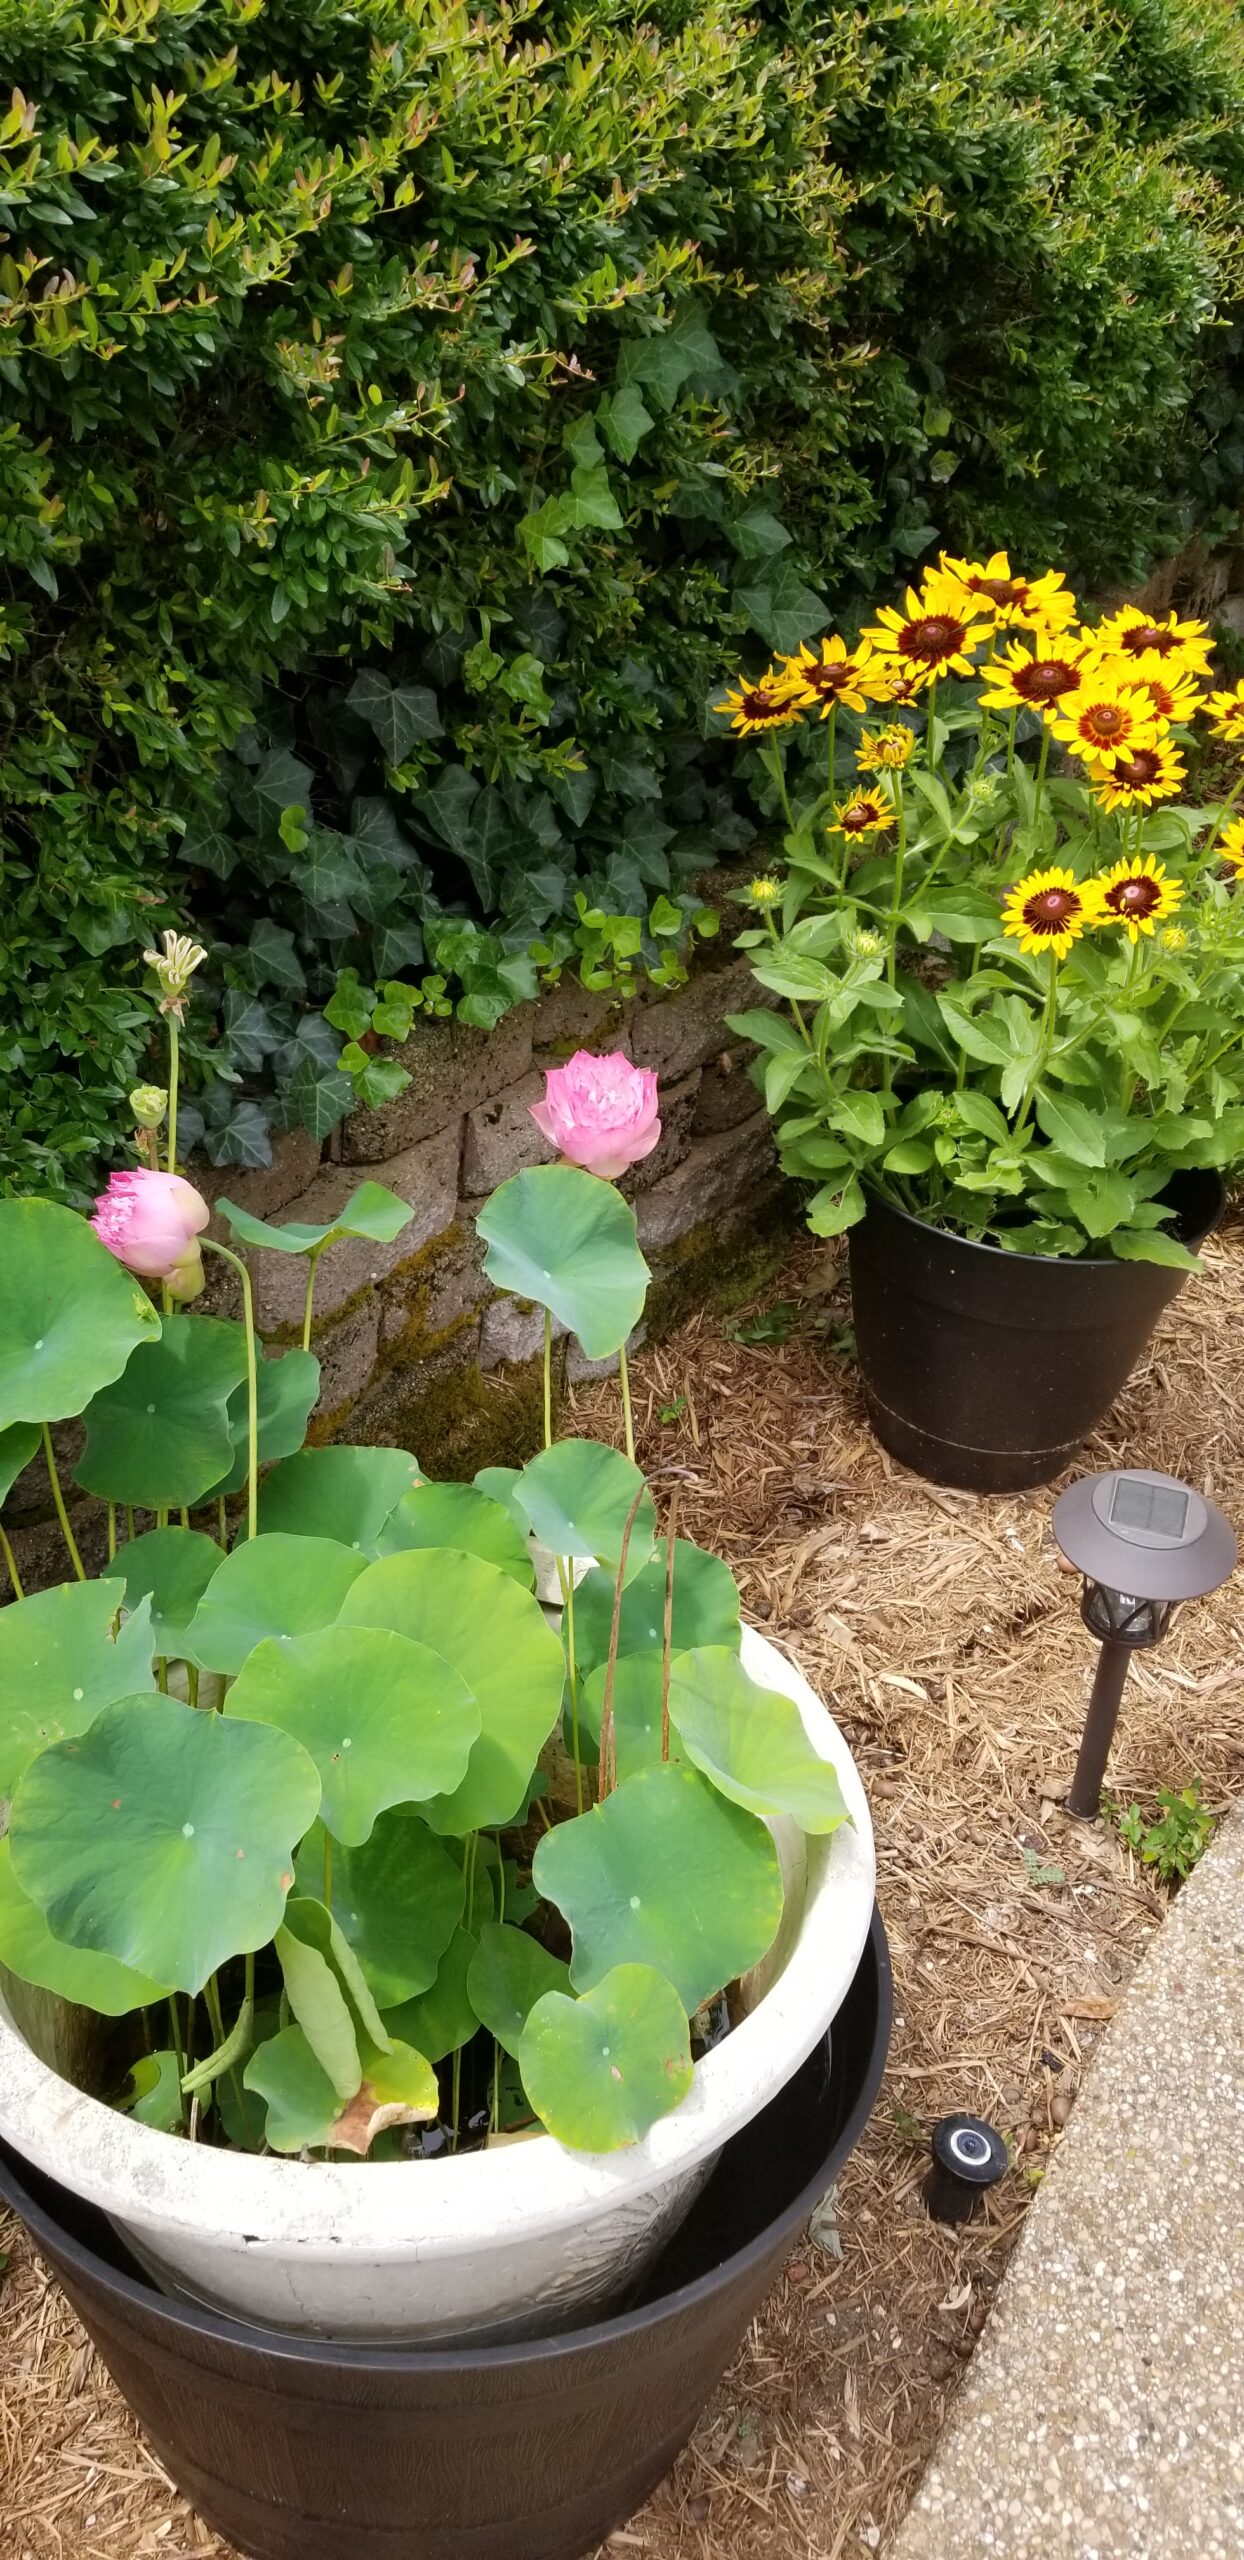
Bring a bit of Asia into your container gardens with a lotus plant.

It’s a stunning, fuss-free plant producing eye-catching blooms and foliage. It performs great in the Texas summers and overwinters easily. And the best part, in a container, it is easily maintained in exchange for its exotic beauty.

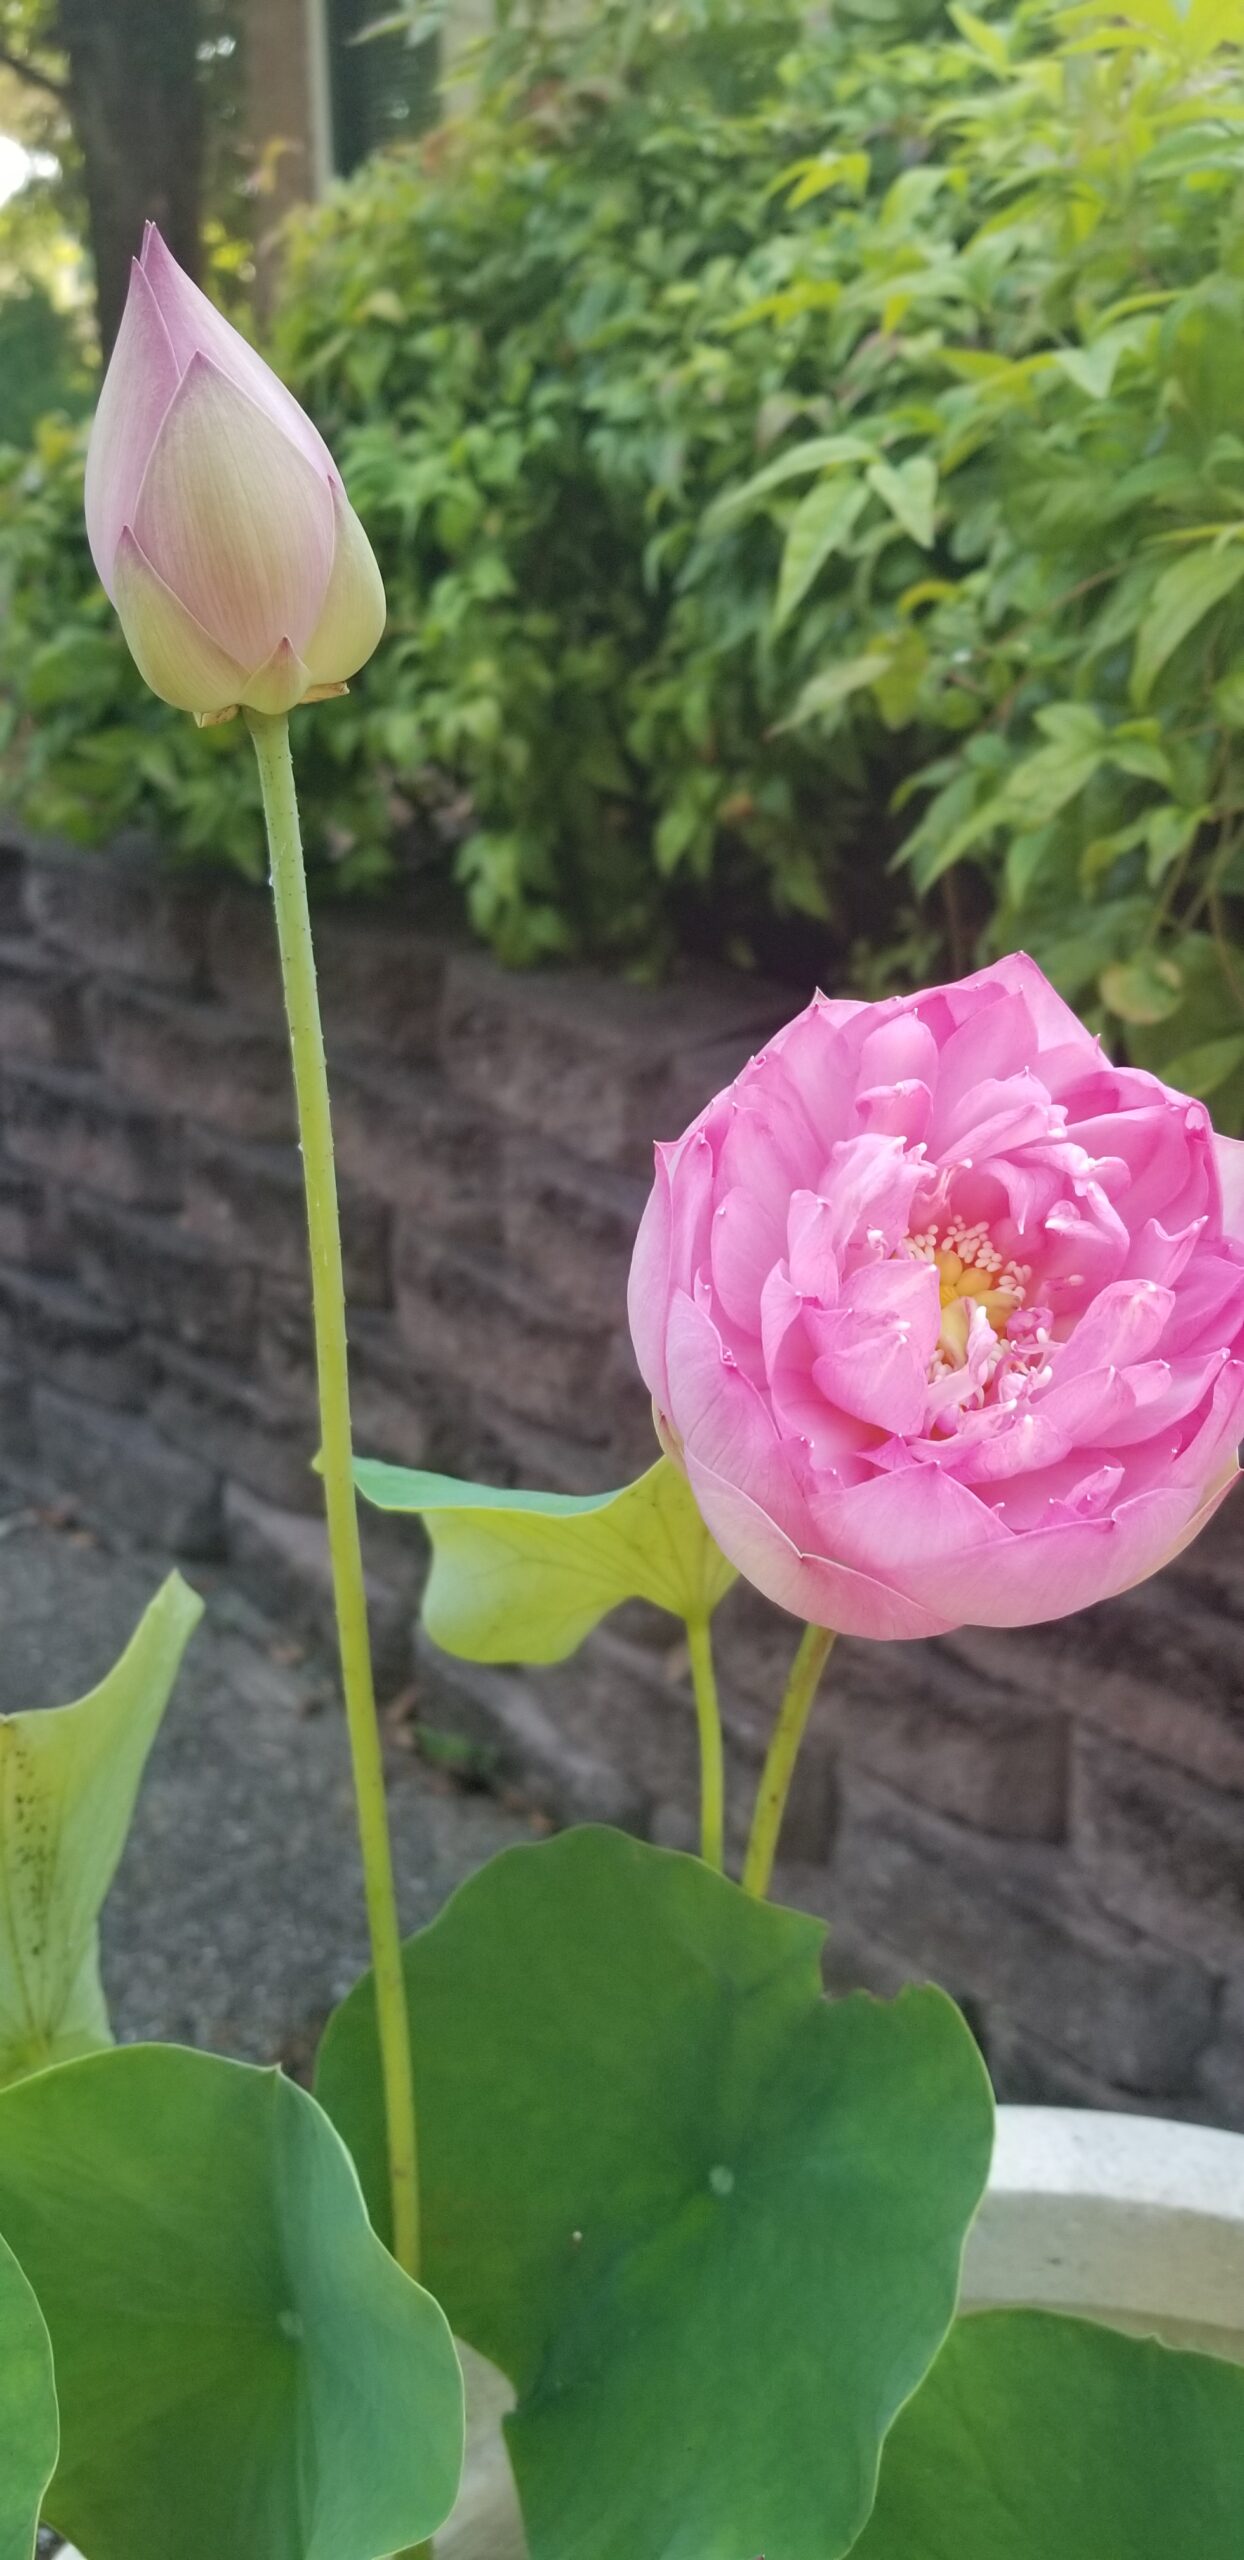
The lotus grows from rhizomes or tubers submerged in water and produces a single spectacular flower per stalk in colors ranging from white, cream, and yellow, to pinks, reds and, more rarely, purple and blue. Depending on the plant, some blooms are tiny and delicate, while others are as large as your hand. Although the brilliant flower lasts for only several days, opening during the day and closing at night, it is rewarding to grow and requires little maintenance in the Texas climate beyond fertilizing it during the growing season and keeping water in the container.

An important point to know about the lotus is that it is not the same plant as a water lily. They are often confused with each other, but they are two separate plants. The water lily (Latin name nymphaeaceae) is native to North America while the lotus (nelumbo) is native to eastern and southern Asia and Australia. They both are hardy plants and grow well in Ellis county (USDA zone 8b).

Both are water-logged plants that look similar, but there are differences between them. One of the most noticeable is where the leaf and flower grow. The lotus leaves and flowers rise above the water level on aerial stems. In contrast, the water lily’s leaves and flowers float on the water’s surface. Lotus leaves have a thin, papery feel while the water lily appears waxy. The leaf shape is also different. The lotus leaves are round and some have a ruffled edge, while the water lily has a distinctive notch or slit from the edge to the center, creating what has been described as a heart shape.

It is possible to start a lotus from seed, but it is easier to plant the tuber. Tubers can be ordered online and they are shipped during in the spring, which is the best time to start them. It is safe to plant the tuber when the temperatures do not fall below 50 degrees. Generally, it is not recommended to start them in a greenhouse because too early of a start can cause the plant to struggle later. It is also important to note that the first year there may not be many blooms, but as the plant ages, the number of blooms increases each year.

To prepare a container for a lotus, you’ll need the following: 

  • A round container with no drainage holes.
  • Potting media, such as silty loam, topsoil (purchased in bags at a garden center), or soil specifically for aquatic plants (sold in bags at the garden center). Do not use regular potting soil because it is too light and will float in the water.
  • Aquatic plant fertilizer and water.

Select a container based on the mature size of the lotus. Small lotus plants do well in small, wide, but shallow containers. Deep containers are best for large plants. As an example, a tiny lotus will be fine in a pot with an 8-inch diameter, and a large lotus will need a 20- to 48-inch diameter container such as a plastic half barrel.

Round-shaped containers are the best choice. As the tubers grow and multiply, they will grow in a circular pattern instead of becoming compacted in a corner. 

Choose a location for the container. It should be where the plant will receive at least 6 hours of sunshine daily. If using a large container, position it in its final location before planting the tuber. Once the container is filled with water, it will be heavy and unwieldy to move.

Prepare the container by putting several inches of soil in it. Add enough water to cover the soil by at least 2 to 3 inches. If it is a large container, more water will be added later as the plant grows. (Tip: wait for a couple hours to let the soil settle in the water before planting the tuber. This way the water will be clear and it will be easy to see the tuber placement.)

Submerge the tuber in the soil making sure the growing tips are pointed upward, but do not bury the tips. The tips should be exposed but underwater. Now comes the wait.

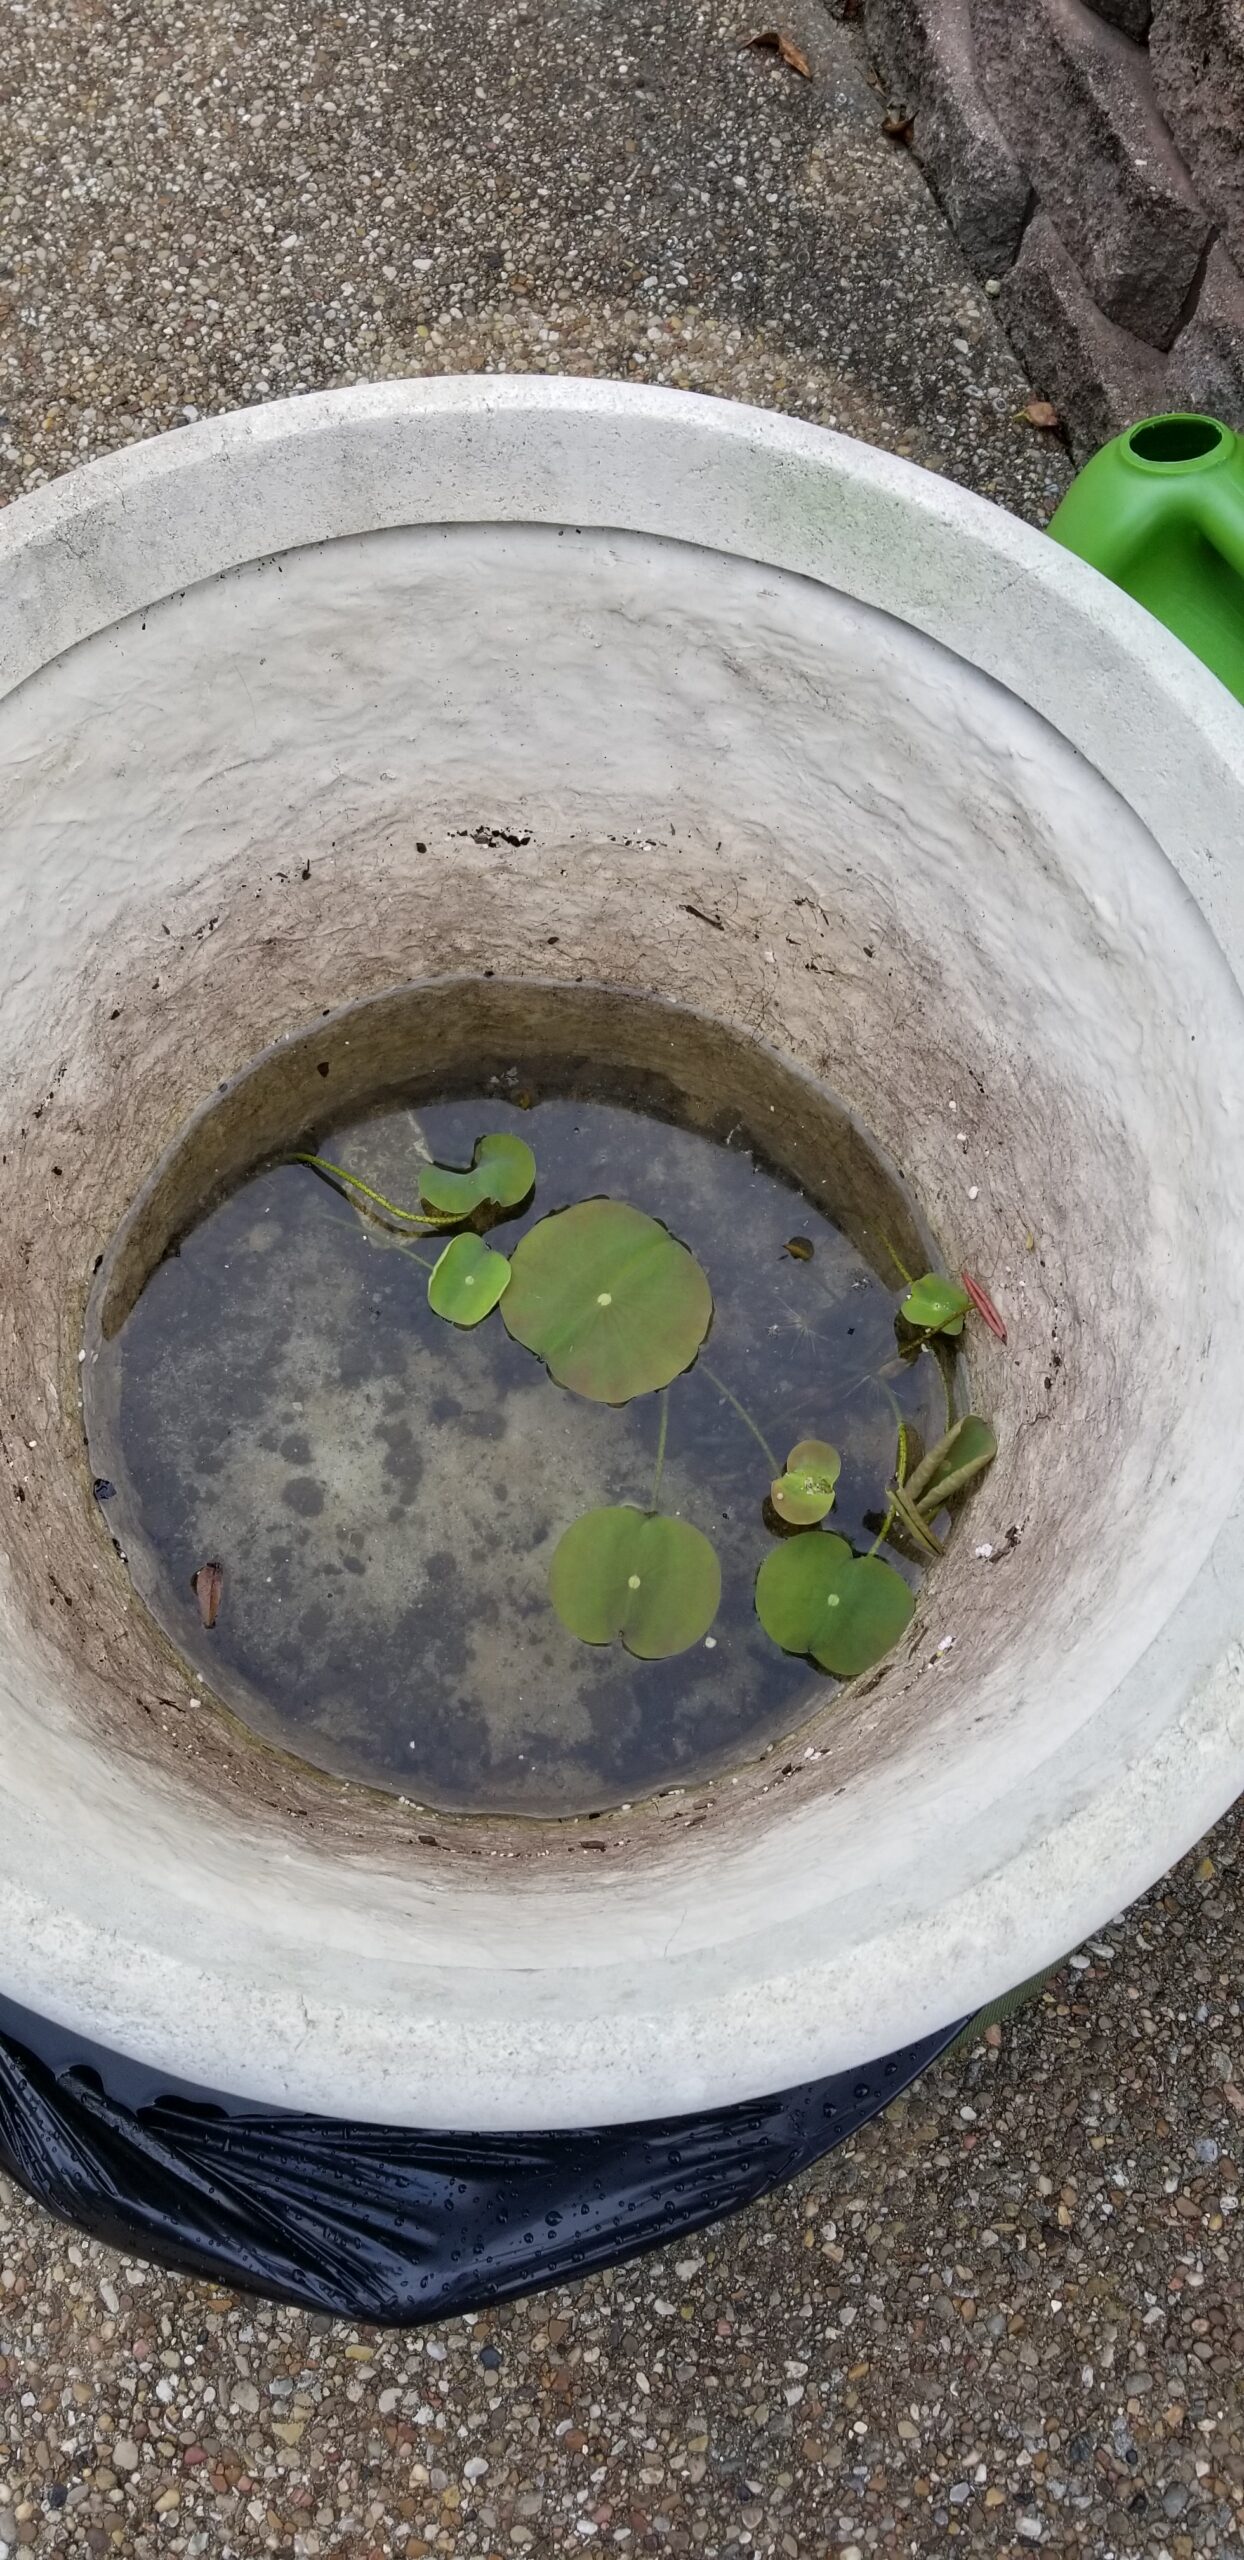
Within several days or so, its first leaves, called coin leaves, will appear. Coin leaves tend to float on the water’s surface, and they begin the process for the season’s growth. During this time, continue to replenish the water as needed to maintain the 2- to 3-inch coverage. Several days to a week or so later, aerial leaves will sprout. It will look like a stem with a rolled leaf at the tip. At this point, raise the water level to near the top of the container (even if it submerges the aerial leaf), and begin fertilizing the plant, following the instructions on the fertilizer label. Mosquitoes are not an issue using a periodic treatment, such as Mosquito Dunk.

And, in a nutshell, that is it. Throughout the growing season, continue to fertilize according to the label instructions and maintain the water level in the pot (for me, I usually add water about once a month during the hottest part of the summer). At the end of the growing season, the stalks will dry out and the foliage will die back. You’ll have lovely distinctive dried seed pods to collect (if desired). Through the winter, it may need some extra water from time to time to maintain the water level, but usually it is maintenance free. The next summer, expect to see those aerial stems sprout again, for another round. It will not be long before beautiful lotus flowers become another attraction to your garden’s beauty.


by Teresa Brown, ECMG Intern

Filed Under: Editorial, Informative Resources, This Month In The Garden, Uncategorized

Planting Your New Tomato Plants

February 29, 2024 by elliscountymastergardeners

One of the things that I always look forward to during the summer is the taste of a homegrown tomato right out of my garden. You probably feel the same way and that is why you plan to buy some tomato plants at the Ellis County Master Gardener Plant Expo on March 23 at the Waxahachie Civic Center.

If you are new to growing tomatoes in Texas or have not been happy with your results, here are a few things to consider to ensure that you have a good crop.

First, there two categories of tomato plants.

Determinate plants have an expected size and growing pattern, will not necessarily need

staking but can be staked, and they bear fruit at a specific time.

Indeterminate plants are more often vining, have no definite size or shape, will usually need a trellis to grow on, and bear fruit all season long.

Second, if you expect great tomatoes, they need well-draining soil and will need additional fertilizing during the growing season. Additional fertilizing starts when the first fruits reach about 1 inch in size and then every four weeks after that.

Third, your tomato-growing success depends on how you plant the tomatoes.

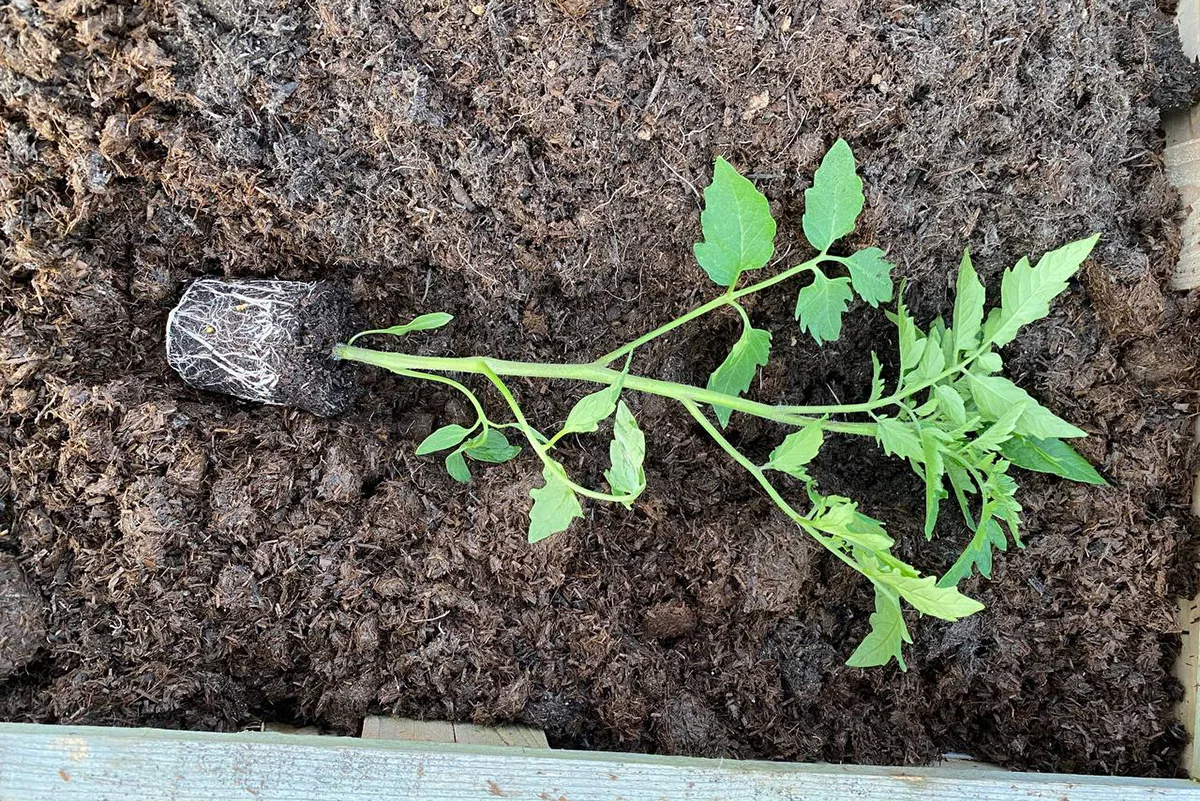
It may sound illogical, but your tomatoes should be planted slightly deeper than where they are in the pot. Very small plants can be planted at current soil depth while medium plants should be planted an additional 2 to 3 inches below soil level after pinching off the bottom leaves. Larger plants (particularly the indeterminate varieties) can be planted deeper by bending the stem in an “L” shape on the bottom of your hole after the leaves on the plant below ground level have been removed. It may sound wrong, but tomatoes are all essentially vines and will happily grow more roots on the buried stems to increase their ability to reach water and nutrients.

Fourth, tomatoes need water.

If you leave a shallow depression around your tomato’s stem, it will help channel water to the plant. Tomatoes need to be watered slowly and deeply. How often depends on the temperature, wind, and amount of direct summer sun. Inadequate water will result in withered plants and small fruit. I purchased a moisture meter to help.

A caution is important here: do not water your tomatoes from the top. Tomatoes get a fungal disease called early tomato blight. The blight fungus overwinters in the soil and overhead watering causes the spores to be splashed up onto the lower leaves. Once the blight starts showing itself, it is very hard to control. I will follow up with a later article explaining how to control the blight. I have found that laying a soaker hose alongside my tomatoes works well and can be put on a timer.

Fifth, support your plants.

Tomato plants can make some very heavy fruit (we all hope) and will need some help supporting them.

Determinate tomatoes can be supported with a commercial tomato cage, think bigger = better. You can make a cage out of reinforcing wire by cutting a section and bending it into a cylinder. I have also made a support out of old bamboo canes and tied the tomato limbs to the canes.

Indeterminate tomatoes are going to need additional support beyond the cages. I plant my indeterminate tomatoes so that they will have additional reinforcing wire to climb. 

Good luck with your tomatoes and may yours have so many fruit that you will have to share your abundance.

by Rob Franks, ECMG

Additional resource from Agie Horticulture:
https://aggie-horticulture.tamu.edu/wp-content/uploads/sites/10/2013/09/EHT-043.pdf


Filed Under: Ask A Master Gardener, EXPO 2024, Newsletter, This Month In The Garden, Uncategorized

What to Do in the Garden

December 1, 2023 by ginnysills

What to Do in the Garden was compiled by one of the Ellis County Master Gardeners as a helpful guide to share with the community that covers maintenance suggestions to keep a healthy and kept garden year-round.

Click on the image or the HERE to download a copy!


Filed Under: Informative Resources, This Month In The Garden, Uncategorized, What to do in the Garden Tagged With: april, August, december, february, january, July, June, March, may, november, october, september, what to do in the garden

Plant Now for a More Beautiful Spring Garden

September 30, 2023 by elliscountymastergardeners

Fall is here and the weather has finally begun to cool, so now is the perfect time to plant some spring-blooming flowers. Ellis County is in the USDA Hardiness Zone 8, which means that the average low temperature is between 10°F and 20°F. Many plants that bloom in the spring prefer cool temperatures and can withstand the lowest winter temperatures in our area, making fall the best time to plant. If started in the spring, these flowering plants won’t have time to mature before hot weather sets in and the plants begin to die back.

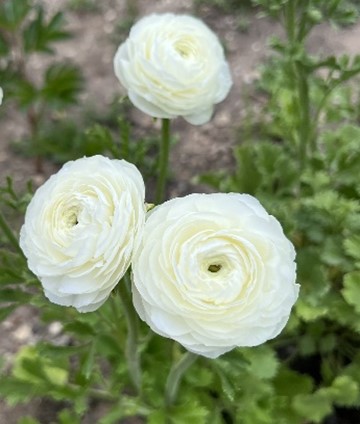
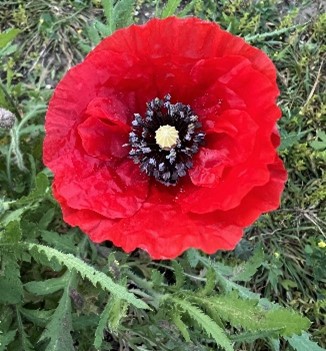
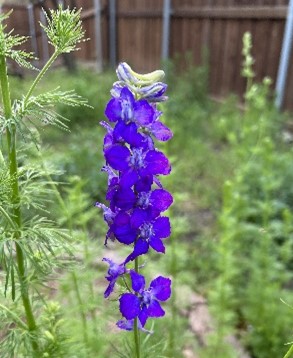
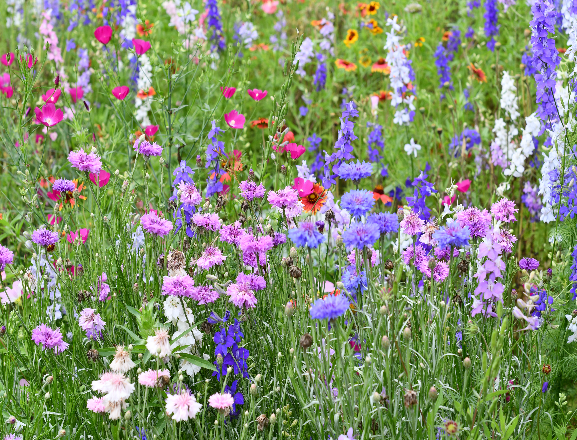
Listed below are a few of the flowering plants that may be sown in the coming weeks for springtime blooms (all photos shown below were taken in my backyard garden this past spring):

  1. Ranunculus

Ranunculus is favored among flower lovers for its rounded blooms reminiscent of roses or peonies. The blooms are available in a wide variety of colors and are long-lasting cut flowers. Plant ranunculus in full sun and fertile, well-drained soil. Set corms with prongs down, one to two inches deep and six to eight inches apart, then water thoroughly. When flowering tapers off and leaves start to yellow, stop watering the plants and allow the foliage to die back. Garden experts suggest that the corms can be left undisturbed as long as the soil can be kept dry as soggy corms will rot, however, I have been digging mine up after the foliage dies back to prevent burrowing creatures from disturbing them. I then replant them at the end of October for spring blooms.
Click link Time to Plant Ranunculus for additional information.

  1. Sweet Pea

With their beautiful, ruffled blossoms and exquisite scent, sweet peas make a great addition to any flower garden. Sweet peas should be planted during the last two weeks of October for early spring blooms. Plant seeds in holes that are about two inches deep at a site with full to partial sun and rich soil that is moist but well-drained. Drop two to four seeds per hole, with holes spaced four to six inches apart. Water thoroughly and keep soil moist until the seeds have sprouted in about 10 to 21 days. When the seedlings are three to four inches high, thin them out, leaving the most vigorous-looking plants four to six inches apart. Sweet pea plants grow tall and should be planted next to a vertical support. Click link Starting Sweet Peas from Seed for more information.

  1. Poppy

Another garden favorite, colorful annual poppies are both gorgeous and easy to grow. Just scatter the seeds over bare soil in full sun from now until late fall. Because poppy seeds are small, mixing them with sand helps separate the seeds for better spacing. Do not cover the seeds but press them into the soil gently as they need light to germinate, then keep the seed bed evenly moist. Germination will occur in about a week. More specifics about growing poppies are available by clicking link, 5 Keys to Growing Poppies Successfully.


  1. Larkspur

Plant annual larkspur seeds in the fall to enjoy their feathery foliage and layers of delicate blooms on spiky stalks next spring. Larkspurs are ideally suited to Ellis County since they tolerate our alkaline soil. They require a sunny location and well-draining soil. Since seeds don’t germinate well when temperatures are above 55°, plant them in late November to early December. For best results, cover seeds with ¼ inch of soil as darkness is required for germination and plant four to six inches apart. Click link Larkspur for additional details.


  1. Wildflower Seed Mix

A great way to enjoy a variety of spring blooms with minimal effort is to sow a mix of wildflower seeds in the fall. Most wildflowers do best in full sun on a mostly level site that drains well. Clear any weeds, mulch, or debris away and rake lightly for good seed-to-soil contact. The site should be free of grass which will choke out the wildflower seedlings. Mixing wildflower seeds with sand makes it easier to distribute them as evenly as possible. Press the seed into the soil by walking or rolling over the newly planted area. It’s a good idea to select a seed mix with several species of wildflowers since it’s likely that not every type of flower will thrive. Click link Plant Wildflowers for Spring Blooms for more information.

Spring 2024 may seem far away, but if you invest a little time and energy in planting this fall, you will be rewarded with an abundance of blooms when the weather begins to warm next year.


Filed Under: Ask A Master Gardener, Newsletter, This Month In The Garden, Uncategorized

  • Page 1
  • Page 2
  • Page 3
  • Go to Next Page »

Looking for something?

Quick Links

Tune in to KBEC every Saturday at 8:10 AM to get gardening tips, suggestions, alerts, and more, from the Ellis County Master Gardeners!

Click Here to Listen Live!

2026 ECMGA OFFICERS

Elizabeth Green President
Burt Plunkett Vice President, Projects
Sally Severson Vice President, Programs
Jackie Nelson Treasurer
Suzie Timmerman Secretary
Betty Gray Director at Large
Sharon McIver Director at Large
Susan Knapp Past President
Texas A&M AgriLife Extension Service
Texas A&M University System Member
  • Compact with Texans
  • Privacy and Security
  • Accessibility Policy
  • State Link Policy
  • Statewide Search
  • Veterans Benefits
  • Military Families
  • Risk, Fraud & Misconduct Hotline
  • Texas Homeland Security
  • Texas Veterans Portal
  • Equal Opportunity
  • Open Records/Public Information