I love to garden. I love growing my own fruits and veggies, knowing where my food comes from, what chemicals have, or moreover, have NOT been used on the food we eat. But it doesn’t come without its challenges! Pests, weeds and diseases can show up no matter how much time and care goes into it. I’ve used companion planting, trap cropping, physical removal of weeds and pests, chickens and guineas for bug control, crop rotation, etc etc all in an effort to reduce or control pests and disease.
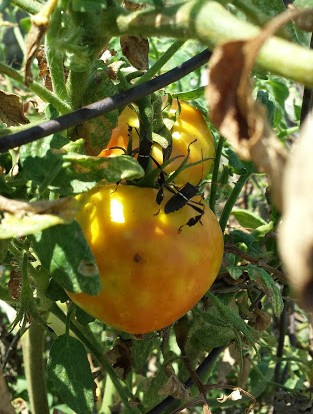
Leaf Footed Bug on Tomato
I have some success but also some epic failures! Last year, the squash bugs decimated my zucchini, this year, the leaf footed bugs have completely ruined my artichokes and peaches and did a number on my tomato crop too.
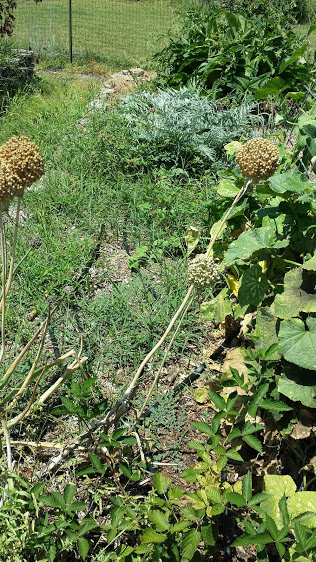
Weed proliferation (how embarrassing!)
Yes, I am an admitted lazy gardener but this year’s wonderful Spring rains, which took a big load off of the watering chores, allowed the nutsedge and dayflower to take hold in abundance! So, I’m ready to take my Gardens UNDER THE PLASTIC.
No, I’m not talking about a greenhouse or hoop rows. I’m talking about SOIL SOLARIZATION. This will involve using a very passive but effective method of using the suns rays and corresponding heat to kill off weed seeds, insects, soil-borne diseases and other harmful soil organisms to give the plantings a boost.
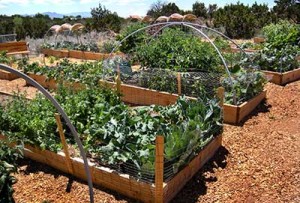
Over the next few months, I will update on the process as I tackle this daunting task. See, we have not one or two beds that need this process but over 8 raised beds, ranging from 8′ x 10′ to 8′ x 40′. Not much I can do about the peach tree but hopefully reducing the pests in the nearby beds will also reduce those that affect the peach crop!
The process sounds fairly simple, though it does involve some preparation. Here is the full process outlined by AgriLife Extension.
To solarize your garden or flower bed, first prepare the soil. Eliminate all weeds and old garden plants. Next, rototill the soil as deeply as possible to produce a uniform soil texture. If your soil is too dry to easily work, irrigate, wait a few days and then rototill.
For solarization to work, the soil needs to be moist and damp to allow sun’s heat to penetrate the ground as deeply as possible. So, give the garden a good soaking before covering it with plastic. An ideal garden setup incorporates drip irrigation under the plastic to maintain soil moisture during solarization and later for watering your garden crops. The plastic used to cover the area should be clear, not black. Clear plastic lets light energy pass through and then traps it, much like a greenhouse. Black plastic absorbs most of the sun’s heat without letting it pass through to the soil below. 1-to-6 mil plastic will work fine – the thicker the better. Pull the plastic tight and cover the edges with soil to help keep the soil moist and to prevent strong gusts of wind from blowing it away.
Leave the plastic in place for at least a month and the longer you leave it on the better the results. Two to three months would be ideal, but good short term weed control can be gained in a month. The soil in the top several inches should heat almost to 150 degrees F. which is hot enough to pasteurize the soil and kill many of the harmful organisms. Apparently beneficial soil organisms bounce back quickly and are not greatly harmed by the treatment.
So I have my work cut out for me! We will likely tackle just a few beds in the next few weeks and leave them covered until well into the fall. My biggest issue will be securing the plastic in place as most of our raised beds are constructed of uneven rock borders. So laying 2x4s or rocks on top of the plastic won’t be enough to hold the plastic in place without gaps.
Stay tuned…
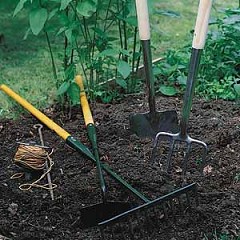 me to get busy in the garden! While February certainly felt like March by the temperatures, it’s now REALLY time to get busy digging in the dirt! There is still plenty of time to get winter chores completed and begin the exciting spring planting!
 For the vegetable garden, hopefully you have prepared your beds with some addition of compost or other organic matter. Onions should already be in, but you may still get a decent crop if you get them in asap. Start a new perennial asparagus bed by planting crowns now. Just remember it takes a full 3 years to begin harvesting. Set out artichoke plants this month. March is the time to be direct seed beans, peas, greens, radishes, and beets. There is still time to get in a good crop of lettuce, too. Tomato transplants can go in the garden as well by mid-March but be prepared to protect them if we get a good cold snap – which we all know is a good possibility!
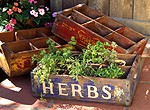 Consider starting an herb garden if you haven’t already! There is nothing like fresh herbs to go along with all the wonderful fresh veggies from the garden! Perennial herbs such as oregano, sage, thyme and Mexican mint marigold are great for beginners. As with most herbs, they will need good soil drainage and full sun. Cilantro and dill like the cooler temperatures so plant from seed now. Parsley and fennel are great additions as well.
 As the Fall sets in and perennials start to die back, the temptation to trim that ‘ugly’ death matter down to the ground can send us searching for the pruners. But WAIT! There are many reasons you may want to wait until late Winter to remove what you perceive to be unacceptable appearances.
 Free bird seed – Flower heads from many perennials are a great source of food for our feathered friends! Echinacea, Sunflowers and many ornamental grasses can sustain many birds over the cold months! Let them eat seeds!
 Four members of the Somervell County Master Gardeners Association made the trek to College Station on Friday, June 17 for the Groundbreaking Ceremony for The Gardens at A&M. Shirley Smith, Donna Hagar, Julie Conner and Mary Ann Steele were among the many Master Gardeners from throughout Texas attending this momentous occasion. Having raised over $135,000 towards the naming rights of the Earth-Kind® Teaching Garden, Texas Master Gardeners were among many other founding donors embracing the beginnings of this incredible undertaking.


 Master Gardeners Donna Hagar and Shirley Smith met with Trey Sexton and Debi Bly on Wednesday, Feb 18 to begin formulating plans for the installation of a Community Garden located on the new Papa’s Pantry Food Bank Property.