• Skip to primary navigation
  • Skip to main content
  • Skip to primary sidebar
  • Texas A&M Forest Service
  • Texas A&M Veterinary Medical Diagnostics Laboratory
  • Texas A&M AgriLife Extension Service
  • Texas A&M AgriLife Research
  • Texas A&M College of Agrculture and Life Sciences
Somervell County Master Gardeners
Somervell County Master GardenersTexas A&M AgriLife Extension Service
  • Menu
  • Home
  • About
  • Contact Us
  • Gardening Info
  • News
  • Members Only
    • Members Hour Form
    • Meeting and Financial Documents
    • Constitution and By- Laws

November Gardening Tips

November 7, 2013 by Donna Hagar

By Linda Heideman, Somervell County Master Gardener

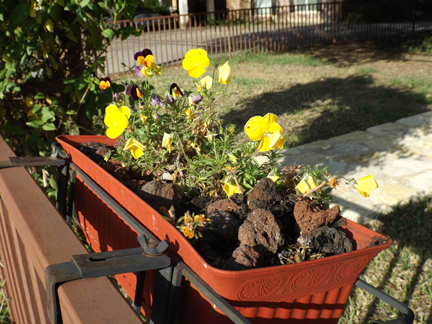
pansyEarly November is a busy time for gardening in our north Texas area.  One of the most important chores is preparing perennials for winter.

While you are preparing your perennial beds for winter you should be thinking about any changes you may have in mind for next year.  Draw and write out your ideas on paper and make any changes you can now, while you are doing fall clean-up and winter preparation.  Clean-up includes not only the removal of debris, but also storing decorative objects and signs away from the harsh winter elements.

Remove plants that have gone to seed.  If you decide to cut back plants that have stopped blooming and the tops have died back, leave 8 to 10 inches above the ground.  Woody plants should not be pruned or cut back at all now.  Do a thorough weeding around your perennials, removing any plants that are not doing well or are no longer attractive.

This is an excellent time to “divide” your spring-flowering perennials.  This means digging them up, dividing the roots, and replanting the newer parts with a handful of bone meal and compost.  When dividing the roots, it is sometimes helpful to have a bucket of water at hand to rinse the soil off the freshly-dug roots to see a good spot to cut the roots.  For the sake of precision, cutting is preferred to just breaking the old from the new roots.  As you divide, pick the best parts to replant where you originally had them, and save the left-overs for other places in your garden or pot them up to give away to your gardening friends.  Protect your perennials with a fresh, deep layer of mulch, and let the leaves fall where they may and stay there to provide an extra layer of protection and nutrients.  Some favorite perennials include:  Coreopsis, Bearded Iris, Bouncing Bet, Daylily, Cannas, Indian Blanket, Louisiana Iris, and Sweet Violet.  Remember, late-blooming perennials should not be divided until spring.

In late November you can still plant and divide perennials, but you’d better hurry!  It is also time to plant some of your spring bulbs including daffodils, narcissus, jonquils and grape hyacinths directly into soil as you buy them.  Remember some bulbs need to be chilled before planting:  tulips and Dutch hyacinths should be refrigerated at 45 degrees until mid-December.

The average date of the first killing frost is November 22nd.  All your colorful, warm-weather flowers will turn brown and you’ll need some cheerful blooms for the holidays and through the winter.  How about some pansies, snapdragons, pinks, flowering cabbage, and flowering kale?  Insects and caterpillars may be hiding in wait for those pretty little pansies and the tasty cabbage and kale leaves.  Sprays containing Bt will control caterpillars best when they are young, and insecticidal soap sprays will control aphids.

Betcha thought November was a quiet month in the garden!   Trees and shrubs should also be planted this month and there’s plenty to do in the vegetable garden!  For more details, check out www.TexasGardener.com , www.centraltexasgardening.net, or www.aggiehorticulture.com.  A visit with your county extension agent or a Master Gardener will yield a wealth of information as well.

Do everything before you put up the Christmas lights.  You’ll be glad you did!

Filed Under: Newsletters

My Favorite Plant – Prickly Pear Cactus (Opuntia)

November 7, 2013 by Donna Hagar

By Sheryl Kleinschmidt, Somervell County Master Gardener

pricklypear            It is this writer’s opinion that all plants were put on earth for a reason, if only to teach us a lesson.   I think that the prickly pear cactus falls into this category to some degree.  In the 1930’s, the Australians learned a valuable lesson regarding the cultivation of this cacti in a non-native environment.  The cacti took over and became a national hazard until a natural enemy to the cactus was discovered and released.

In Central America, Mexico, and the Southwestern United States, where the prickly pear cactus grows naturally, indigenous populations have learned to utilize it efficiently.  Over centuries, the prickly pear cactus became a good source of nutrition (both the pads and the pears), was used medicinally, became food for livestock, dyed cloth, and was grown in thickets as fencing to outline property and keep out intruders.

The prickly pear cactus is extremely versatile and is now found worldwide because it tolerates a wide range of temperatures, moisture-levels, and altitudes.  In good conditions, the cactus can reach heights of about seven feet.  Its fleshy pads have given the most common culinary species, the Indian Fig Opuntia, the common name of Paddle Cactus.

The pads of the cactus are a storage tank for water, produce flowers, and are the factory where photosynthesis takes place.  Spines are found on most species, but all prickly pear cacti have glochids—the tiny hairy barbs that stick in your skin and cause extreme irritation.

When used as a vegetable, the pads are considered best when small and tender.  After removing the thorns and glochids (hints given later), pads can be cut into strips and sautéed in a pan with olive oil and other vegetables such as onions, mushrooms and peppers.  Raw nopal makes a good addition to fresh salads while fried nopal makes a terrific appetizer.

Prickly pear fruit, also called tunas, grow from one flower and range from very light yellow to bright orange and magenta.  The pears ripen from September to November and sweeten with age.  Once picked, they only keep a week and must be used quickly.  The most common uses of the pears are for making wine, juice and jelly.

Harvesting pads and pears must be done with great care to avoid a handful of glochids.  Wear heavy gloves and use tongs and a knife to cut both fruit and pads from the main plant.  Glochids can be removed in several ways:  scrape them off with a blunt knife, burn them off over an open flame, pressure wash, or roll them in clean sand.  Chilling them in cold water for a few hours makes some of the glochids release as well.

I have only made prickly pear cactus jelly once.  It was definitely a learning experience and I DID get some annoying glochids stuck in my hands as a souvenir!  However, the jelly was some of the most wonderful I have ever made and knowing that it came from a native Texas plant made it all the more special.  The tunas are ripe now, so why not try it yourself?

TEXAS PRICKLY PEAR JELLY

Fruit Preparation:  Gather ripe tunas (when very dark) with tongs. A small bucket-full should be enough. Remove thorns/glochids. Wearing rubber gloves, cut tunas in half and put in a large pot with just a little water in the bottom.  Cover and simmer until soft enough to mash. Simmer, uncovered, another 5-10 minutes.  When cool, squeeze through cheesecloth or a jelly bag.

Mix 5 cups of cactus juice, the juice of 2 lemons, 7.5 cups of sugar and a box of Sure Jell.  Follow the directions on the Sure Jell box.  Yield is 9.5 pints.

Filed Under: Newsletters

VERMICULTURE 101

November 7, 2013 by Donna Hagar

By Christine Morgan, ND, Somervell County Master Gardener Intern

What is it and why is it important?

wormsLet’s start with some definitions. What is vermiculture? It is the raising of earthworms under defined and/or controlled conditions. In this application, it is a cultured organism. The culture of earthworms is known as vermiculture. Vermicomposting is defined as using earthworms and microorganisms to convert organic waste into black, earthy-smelling, nutrient-rich humus. Humus is a nutrient-rich, complex, highly stable material formed during the breakdown of organic matter.

There are two different forms of vermicomposting. The first is a compost pile outside consisting of dead plants, leaves, green grass clippings, small twigs and herbivorous animal (cow, horse, goat, sheep, rabbit) manure. Poultry manure can be used sparingly from clean flocks and if it is aged. Green poultry manure can be very strong and for other reasons is not recommended as the primary manure. The best sources are from only plant eating animals. Some people also add kitchen waste from fruit, vegetables, greens, and egg shells. Manure from dogs, cats, pet rodents, and pet birds should NOT be included. Meat, bones, shellfish waste, and dairy products should be excluded also.

The second form is indoor kitchen waste only composting. People use this method to recycle kitchen garbage, make a wonderful soil additive and fertilizer, and raise earthworms to sell and for fishing.

Worms need a constant temperature (between 59-77*F) to be happy and healthy. Below freezing will kill them if they are exposed to 32*F temperature or lower. Outdoor worms burrow deeper as it gets hotter in the summer (above 86*F), and move closer to the surface in the Fall and Spring. In the cold of Winter, they again move to warmer quarters whether that is the center of a warm, active compost pile or deeper in the ground. Kitchen waste composters do best in an indoor environment like a basement or cooler room, especially because of the fact that their habitat is constantly being opened and changed…i.e. influx of new waste material every week.

Temperature, moisture, acidity, and ventilation are very important factors to take into consideration if you want worms to work for you. Worms “breathe” through their skin, which must be moist for exchange of air and excretion of waste (castings/worm manure) to occur. Yes, worms can drown in too much moisture/water. They are fairly tolerant of a wide range of acidity. On a 14-point PH scale, 1 being very acid and 14 being extremely alkaline…PH5 to PH9 is suitable. So they like a slightly acid environment, more to the acid side than alkaline. Ventilation is important because they need oxygen to “breathe” and do their “work”. They produce carbon dioxide just like we do, and use oxygen in many of their bodily processes. Breaking up soil, digesting waste matter is what they do. Sort of like tiny plows, breaking up and aerating the soil to help plant roots grow and spread.

The next important piece of information is the fact that there are two different general types of earthworms. Who knew? We have “earthworkers” and “composters”.

First, let’s discuss “earthworkers”. These are the worms you mostly find outside in soil, gardens, and under planters, buckets, etc. They are the “soil-dwelling” species. The scientific name for one of the most prolific species is Lumbricus terrestris. They don’t process large amounts of organic material, they don’t reproduce well in confinement (captivity), and it makes them nuts if someone digs around and messes with their burrow system. Their common name is “nightcrawlers”. This worm is the most studied of the 4,400 species of earthworms currently named. Another trivia fact…none have been found in Australia! They require large amounts of soil or decaying material and like it cool (50*F). Digging burrows and knowing the intricate burrow system is very important to them. They have a territory and don’t like moving day. They play an important role in soil fertility. They perform important soil mixing functions as they travel between the surface and several feet below. They take organic materials into deeper layers of the soil, mix it with subsoils that they consume in their burrowing activities, and bring mineral subsoils to the surface when they deposit their casts (worm poop). The burrows aid in soil aeration and in water retention by increasing the rate at which water can penetrate the deeper soil layers. In plant beds, near water faucets, or garden spaces they are free to burrow and work their magic.

The second general category of worms is the “composters”. Composters are worms that consume and process massive amounts of organic material. They reproduce quickly in confinement, and tolerate the disturbance caused by adding bedding and burying new waste. They don’t really care about burrows…they are more concerned with food, eating, and reproducing. The scientific name for a large species is Eisenia fetida. Their common names are Redworms, Tiger Worms or Red Wigglers. Their natural habitats are manure piles, compost piles, or decaying leaves in heavy brush or forest type habitats. They tolerate a wide range of temperature, acidity, and moisture conditions. They are tough worms and withstand handling well. They tolerate being shipped through the mail and living in plastic bait containers without dying. Like I said, they are tough. They like to live and work on the surface in upper layers of soil or bedding, perfect for living in bins and adding new layers of organic material on a regular basis. Another composting species, Lumbricus rubellus, has the potential for doing double duty as a composter and earthworker.

Interesting Worm Facts

Earthworms don’t have any teeth, but they have a gizzard like a chicken; grit helps them grind and process organic matter, which is their food. They have no eyes and can’t see…but making cartoons of worms with no eyes seems wrong somehow… Worms are hermaphroditic. Worms have both ovaries and testes, so they can decide who they want to be! They make cocoons with the egg in it and fertilization takes place in the cocoon. Usually 2 or more worms hatch from one end of the cocoon. It takes two worms to fertilize an egg in the cocoon.

Worms are very important in farming and gardening. They are hard workers in breaking down decaying matter and making soil more beneficial to plants. We know when we see earthworms in our gardens, that the soil is rich and probably healthy to support plant growth. If you have no worms in your soil, I suggest getting a soil test ASAP from your county agent to find out why. Recycling kitchen waste and composting outside is a “green” action that helps the earth, your garden and your plants. Worms are an important link in the cycle of life.  Now you know more about worms than your neighbor!

References:
www.aggie-horticulture.tamu.edu/beneficial
Worms eat by Garbage by Mary Appelhof
www.easttexasgardening.tamu.edu

Filed Under: Newsletters

Gardening Successes/Flops and Whimsical Container Gardening

October 10, 2013 by Donna Hagar

Community Horticulture Education Series
Monday, October 14, 6:30 pm
Somervell County Citizens Center
209 SW Barnard, Glen Rose
Free and Open to the Public

Fun Container Gardening and What Works and What Doezn’t

Pumpkin ContainerThis month’s CHES meeting with be presented by two of our very own Somervell County Master Gardeners.  Come and hear our President, Shirley D. Smith, share with you what has worked around her gardens and what has been a flop!  She will share a slide presentation showing some of her foul-ups as well as some of her successes.  Then, the SCMGA Historian, Julie Conner, will talk to you on “Fun Container Gardening.”  Julie is quite talented when it comes to planting container gardens and decorating them with ordinarily “found” objects.

As usual, we will have door prizes.  So, come join us in this very informative two-part program. You will NOT be disappointed.

Filed Under: CHES, Newsletters

Gardening Tips for October

October 10, 2013 by Donna Hagar

By Shirley Smith, Somervell County Master Gardener

Thank goodness the weather has begun to cool down a little and we can get back outside without the fear of heat stroke!  So now is the time to look around your area and see what needs attention.

If you are going to be putting in a fall garden and you want to be certain you get what you think you are ordering, then be wary of catalogs that only give you the common name of a plant.  Often, the common name can vary from region to region.  Only the scientific, or Latin, name ensures you will get exactly the plant you are looking for.

Okay, while we are on the subject of correct wording, here is another tip:  The word “native” refers to plants that grow in the same habitat in which they originated.  “Exotic” plants are those growing in a different area where they originated.  Plants can be native to a continent, state or region.

Buy green.  Buy garden products that don’t pollute.  Try organic fertilizers and pesticides which won’t harm the environment after they break down.

Plants can help improve the air inside your home.  The foliage and roots filter such household pollutants as benzene and tobacco smoke.

pumpkins-clusterJust in time for Halloween, here is a tip about pumpkins.  The pumpkin is one of the most versatile members of the gourd, or cucurbit, family.  It is not only used for pies and soups, but also has seeds that make tasty snacks when dried and roasted.  And, of course, the proverbial jack-o-lantern will be seen all over during the month of October.

Add a little color to your garden by painting your flowerpots (terra cotta or plastic) bright colors and placing them strategically around your beds.  You might even want to paint that old chair a bright color.  Try it and see how you like it!

Want your clematis or other climbing vine to cover your light post, but there is nothing on the smooth surface of the post for the plant to cling to?  To solve this problem, use a scrap of heavy-gauge wire to create an excellent support.  First, attach the end of the wire to the screw or lateral extension at the top of the post.  Then coil the wire down around the post and insert in into the soil.

To protect perennial vines during that cold spell that we always seem to get, untwist the wire and, with the vine attached, gently push it to the ground.  Mulch over the vine for the cold period.  Be sure to uncover it when the danger of frost has passed.

I use a lot of “staples” for my drip irrigation system and found that these can be quite expensive.  I give my husband the task of cutting up old coat hangers to the length I need and bending them to fit either over my ½’ main line or the ¼” line.  They work wonderfully and I don’t have to worry about losing them down in the mulch!

Keep 1-gallon milk jugs filled with water near thirsty plants that always seem to need watering but are a pain to reach with the hose.  Keeping jugs handy not only reminds you to give them a drink, but it also makes watering a breeze.

Happy gardening!

Filed Under: Gardening Tips, Newsletters

Esperanza – Favorite Plants of Master Gardeners

October 10, 2013 by Donna Hagar

Esperanza or Yellow Bells, Tecoma stans

Submitted by Donna Hagar, Somervell County Master Gardeners

esperanzaHave you been in downtown Glen Rose lately? If so, you surely have seen the large yellow blooming shrub on the north east corner bed of the square by the Coca Cola building. Many folks have asked what this showy shrub is. The answer is an Esperanza or Yellow Bells, scientific name Tecoma Stans. This is a Texas Super Star, and is gaining popularity as an ornamental plant in Texas gardens. In the wild in Texas it can be found growing on rocky slopes near San Antonio and in the Trans-Pecos. This is a cold tender plant, hardy to zone 8b. In our area, if you plant it on the south side of a home or structure, protected it from the north winds, mulched HEAVILY in the winter, it will die back but should come back from the roots. It can also be used as a fast growing, large container plant which may be moved into warmer winter quarters. The striking, tubular 2 1/2-inch bright yellow flowers are highlighted by the attractive, shiny, green foliage and continue through the heat of the summer. The flowers have sweet pleasing fragrance and also provide nectar for bees. Plant with the purple fall aster for an amazing show of contrasting purple and yellow flowers for this time of year.

Plant Habit or Use: small shrub medium shrub
Exposure: sun
Flower Color: yellow
Blooming Period: spring, summer, fall
Fruit Characteristics: 4- to 6-inch-long capsule
Height: 3 to 6 feet
Width: 3 to 4 feet
Plant Character: deciduous,
Heat Tolerance: high
Water Requirements: low
Soil Requirements:
neutral, alkaline

Filed Under: Archived Newsletter 2013-present, Favorite Plants

Unique Plants

October 10, 2013 by Donna Hagar

Submitted by Bonnah Boyd, Somervell County Master Gardener

   Looking for an unusual plant to add to containers or in beds?  The eyeball plant, a short sprawling annual with copper-tinted foliage and unique golden “eyeball shaped” flowers may be a choice.

Eyeball Plant   Native to South American tropics, Acmella oleraceae (also known as Spilanthes oleraceae, and various common names as eyeball plant, toothache plant, peek-a-boo or paracress) is an herb used to add flavor to a bland diet.  The foliage has a pleasant salty flavor that eventually leaves a numb feeling to the mouth.  It may have received the common name of toothache plant because of its use as a local anesthetic for gums and teeth.  Some sources attribute that common name to the appearance of the flowers that resemble a sore tooth.  The flowers are bi-colored red and gold, looking like a yellow olive stuffed with a bright red pimiento “eye”.

   This plant is easily grown from seed.  Although it can be sown directly outdoors, it is better to start plants indoors 6-8 weeks before the last frost, because it will not tolerate frost and requires warm soil to germinate.  Seeds should germinate in a little over a week. The plant grows about 12”- 15” tall and spreads 24”- 30”.  The flowers are produced on the ends of long stems.  A little extra maintenance will improve the plants appearance.  Pinch at about 3 weeks after transplanting, leaving 2 sets of true leaves intact.  Pinching encourages better branching and a more uniformly shaped plant, but will delay flowering by about a week.

   Plant in full sun or very light shade.  The plants prefer rich soil and evenly moist, but not wet soil. Irrigate when dry and do not allow the plants to wilt.  The plants  bloom repeatedly from midsummer to early fall.   Use it as a summer flowering container plant for sunny patios.                                          

References: University of Wisconsin – Extension Master Gardener Program

Filed Under: Archived Newsletter 2013-present, Gardening

Pollinators, Pests and Predators

September 2, 2013 by Donna Hagar

Community Horticulture Education Series
Monday, September 9, 6:30 pm
Somervell County Citizens Center
209 SW Barnard, Glen Rose
Free and Open to the Public

 “Pollinators, Pests and Predators”

Speaker Curt Decker, Natural Resource Specialist, Fossil Rim Wildlife Center

arthropodsJoin us on September 9, 2013 for our Community Horticulture Education Series program “Pollinators, Pests and Predators”. Curt Decker, Natural Resources Specialist at Fossil Rim Wildlife Center will examine the various arthropods we might come across in the garden and the various roles they play. By nearly any measure, the most successful animals on the planet are the arthropods . . . the REAL rulers of the Earth!

Curt will explore those commonly considered “beneficial” (pollinators and those that control “pests”) as well as some that might surprise us in how they fit into a gardens health. Discussion will involve ways we can encourage the desired ones and what we can do to discourage those we would rather not have. Each and every critter has a role to play and the more you know about the subject the better off your growing plants will be.  Curt is extremely knowledgeable about all things that creep and crawl about on the ground or buzz about in the air and loves to share one of his favorite passions. You are sure to learn AND be entertained as well!

This program is FREE and open to the public! Children are certainly welcome and encouraged, too! Door prizes will be given out as well!

Filed Under: Archived Newsletter 2013-present, CHES, Newsletters

Fall is Just Around the Corner

September 2, 2013 by Donna Hagar

Submitted by Merilyn Cranford, Somervell County Master Gardener

     Another hot summer is almost behind us and everyone should be looking forward to cooler weather and Fall time.  However, those fantastic gardens that were planted last spring are now looking downright shabby.  Daylilies and hostas are starting to look tired, with yellowing foliage and spent bloom stalks.

     But just because it’s nearly Fall doesn’t mean you have to give up on the garden and wait until spring to clean it up.  In fact, this colorful season offers some of the most pleasant weather for working outdoors.  It doesn’t take a lot of time and money to have a beautiful fall garden, but you need to get started by cleaning up what’s left over from spring before adding anything new for fall.

     Cleaning up may not mean more work than a swift tug of the old plants for quick removal.  But if you’re more proactive and get to work while the old plants are still somewhat green, just snip tall stalks back with pruners.  Cut near the base of the plant, down to the foliage, to keep plants looking tidy.  With cleanup taken care of, you can see what holes need filling and go shopping.

     Some suggestions for your consideration might be Hamelin fountain grass, Indian blanket, Pineapple sage (salvia), Chrysanthemum, Blue mist, Sedum, Mexican heather and other ornamental grasses.  Play with color, be creative and don’t be afraid to be different.  Also, don’t forget that fall is bulb planting and dividing time.

Filed Under: Archived Newsletter 2013-present, Gardening, Newsletters

Iris – Favorite Plant of Master Gardener

September 2, 2013 by Donna Hagar

Submitted by Julie Conner, Somervell County Master Gardener

Louisiana IrisDid you ever drive by an old homestead where only the chimney remained standing. Yet in the corner of the foundation there is a growth of Iris. Why does that Iris come up each year? The Iris is from the family of flowers that grow from a bulb and when planted
in the right spot they require a minimum of care, as the Iris on the old homestead prove.
 
Rhizomes, corms, tubers and bulbs are a group of plants that grow their stems underground. Many of these bulbs require a low temperatures for a period of time before they send up new growth. Most of these plants prefer sunny spots because their leaves need the exposure to sunlight in order to product food which is stored in the bulb for the next season growth.
 
Iris can adapt to almost any soil but for best results prepare a bed for them and in a location that gets at least 6 hours of sun. Allow at least 3 inches of organic matter in the bed then place the bulb approx one inch below the surface then layer 2 inches of mulch on top and water thoroughly.
 
Iris bloom spring through summer depending on variety. Once the blooms have done their thing the bloom stalks can be removed. Do not trim back the leaves or blades much as the bulb still needs to produce food for the bulb. You can fertilize in the spring as new growth appears. A good rule of thumb for the bulb plants “if it blooms in the spring or summer then you will dig, divide and plant in the fall”.
 
There is a large variety of Iris from bearded to dwarfs and range in heights of 3 inches to 27 inches. There is a Ft Worth Iris Society which is having a sale Sept 28th at the Ft Worth Botanical Gardens. This would be a great time to investigate the possibilities of Iris in your garden.

Filed Under: Archived Newsletter 2013-present, Favorite Plants, Newsletters

  • « Go to Previous Page
  • Go to page 1
  • Interim pages omitted …
  • Go to page 35
  • Go to page 36
  • Go to page 37
  • Go to page 38
  • Go to Next Page »

Upcoming Events

Apr 10
6:30 pm - 7:30 pm

April CHES

Apr 19
10:00 am - 11:00 am Event Series

Monthly Meeting

Apr 22
8:00 am - 12:00 pm

2023 Plant Sale

May 17
10:00 am - 11:00 am Event Series

Monthly Meeting

Jun 21
10:00 am - 11:00 am Event Series

Monthly Meeting

View Calendar

Get Updates

Subscribe to Our Newsletter

RSS Recent Posts

  • Vegetable Gardening in North Texas
  • Somervell County Master Gardening Association Presents
  • Community Education!
  • Monday Funny

Administrator Only

  • Log in
  • Entries feed
  • Comments feed
  • WordPress.org
Texas A&M AgriLife Extension Service
Texas A&M University System Member
  • Compact with Texans
  • Privacy and Security
  • Accessibility Policy
  • State Link Policy
  • Statewide Search
  • Veterans Benefits
  • Military Families
  • Risk, Fraud & Misconduct Hotline
  • Texas Homeland Security
  • Texas Veterans Portal
  • Equal Opportunity
  • Open Records/Public Information