• Skip to primary navigation
  • Skip to main content
  • Skip to primary sidebar
  • Texas A&M Forest Service
  • Texas A&M Veterinary Medical Diagnostics Laboratory
  • Texas A&M AgriLife Extension Service
  • Texas A&M AgriLife Research
  • Texas A&M College of Agrculture and Life Sciences
Somervell County Master Gardeners
Somervell County Master GardenersTexas A&M AgriLife Extension Service
  • Menu
  • Home
  • About
  • Contact Us
  • AgriLife Extension Service
  • News
  • SCMG Gardening Resources
  • Members Only
    • Members Hour Form
    • Meeting and Financial Documents
    • Constitution and By- Laws

Raising Shasta Daisies

December 31, 2015 by lheideman

By Merilyn Cranford, Somervell County Master Gardener

downloadShasta Daisies have long been sunny garden favorites, both in beds and, with their long, stiff stems, as cut flowers.  They’re a cinch to grow, they bloom for a long time and they attract butterflies, but not deer.

One of the more familiar types is known as ‘Becky’, a heavy bloomer with an upright habit.  It starts to flower in July and keeps it up straight through to September.  It’s true that ‘Becky’ is a great favorite of many people, but there are others as well.

Plenty of the new cultivars sport larger flowers, with more eye-catching petals than the older Shastas.  One that might catch your eye is named ‘Fluffy’ because of its double flowers sprouting threadlike petals.  Another is ‘Fiona Coghill’, with its audacious pompon flowers.  The stout stems are strong enough to hold heavy blooms, even when they are wet after watering or rain.  Additionally, ‘Crazy Daisy’ is a 30-inch tall Shasta that adds a playful attitude to the garden and the haphazard arrangement of petals is as endearing as its name.

There is a size to fit everyone’s taste.  Some Shasta cultivars range in height from 10 to 40 inches and flower size from 2 to almost 5 inches across.  For the most part white is the color of Shasta daisies, though there are a few that claim yellow petals.  Two of these are named ‘Sunshine’ and ‘Cobham Gold’ which is closer to a soft butter-cream color.

Because of their inherently rugged nature and the range of plant sizes, there are many different uses for Shasta daisies.  Some may look well at the center or back of the flowerbed.  Or a large grouping makes a big impact, especially when you view it from a distance.  If you’re not crazy about deadheading all those daisies, place the bed at the far end of the yard where a few faded blooms aren’t as noticeable.  Or grow them in containers.  Give them full sun and even moisture, but make sure the potting mix is well-drained, so the roots don’t rot.

So try a few Shastas – you’ll soon be hooked.  Because however you use them, Shastas add a touch of magic to your garden, along with tons of fresh white blooms, from simple to simply splendid!



Filed Under: Current Newsletter, Favorite Plants, Gardening, Newsletters

Planting Trees

December 31, 2015 by lheideman

by Julie Conner, Somervell County Master Gardener

In your landscape plans, the trees should be planted first.  Early fall in Texas is the best time to plant trees especially bear root or ball.  Container trees can be planted almost any month, just keep in mind watering conditions.

The hole for the tree should be wider than the root ball or container and as deep as the roots.  Moisten the bottom of the hole with water and loose soil.  Always lift the tree by the root ball and not the trunk.   Once out of the container or ball, cut any roots off that have started to circle the root ball.  Place tree in hole and backfill with loose original soil (organic matter can be added if soil is heavy).  Tap soil down to secure tree in place being sure to keep trunk straight.  Root stimulator is always a good idea when filling in hole and water thoroughly.  Mulch around tree with 3 to 4 inches of bark mulch.  Water every 7 to 10 days if no rainfall for at least the first 3 years.

If a young tree needs support due to a windy site place 2 stakes parallel to trunk and 18 inches into the ground approximately 12 inches beyond hole.  Stakes should be above ground @ 2/3 the heighth of tree.  Protect trunk from wire with a rubber hose.  Attach loosely around trunk.  Take supports off after one growing season.

As the tree matures and gets new growth pruning may be necessary to keep its shape and eliminate dead or damaged branches.  Never top a tree for any reason and keep any vines or briars from stunting tree growth.  Watch your young tree for any signs of disease or insect damage.   Winter weather can also cause loss due to frost so protect when necessary.

A happy tree is a healthy tree.

Filed Under: Current Newsletter, Gardening, Newsletters

Landscaping With Trees

November 1, 2015 by lheideman

by Julie Connor, Somervell County Master Gardener

Before heading to the nursery for a tree, do some analysis of your landscape by making a diagram of your property.  Are you planting for privacy or to enhance your yards’ curb appeal?   There is also the view from your windows.  The trees of choice should have a harmony within your yard whether symmetrical, asymmetrical or a repetition of the plantings.  The height and form of the tree should have a scale appropriate to the house and yard.  The size of the mature tree will dictate where it is planted.

Evergreen trees will have foliage year round thus making a good screen or wind break.  Deciduous trees will shed their leaves giving winter warmth, if planted on the south side, but also shade during the summer months.  How much maintenance will the tree require?  Will it need to be pruned yearly and how suspectible to disease or insects?  If the tree is a fruit or seed bearer will this cause a messy yard?

Trees will come one of three ways from the nursery:  bare-root, balled and burlapped roots or a container grown plant.  The selection will dictate how and when to plant the tree.   When selecting a tree at the nursery choose one with a smooth trunk, free of blemishes such as wounds or scarring.  Inspect the leaves for insect damage or disease.  Just like your Christmas Tree, you want the branches to be evenly spaced around the tree.

Take your diagram with you to the nursery and review your wants and expectations for your yard with the business owner.  The nurseryman can give you additional information regarding your selections.  Because we live in Texas, keep in mind the native species, as they are more tolerant of our weather conditions.  If, at the nursery, you come across a good looking tub of mums, I’m just saying, it IS fall.


Filed Under: Current Newsletter, Gardening

Pink Texas Skullcap

August 28, 2015 by lheideman

by Merilyn Crawford, Somervell County Master Gardener

Pink Scullcap   This interesting plant belongs to the Scullaria genus and has a botanical name of Scutellara Suffrutescens.  It is known to be drought tolerant, heat resistant, and sun-loving.  Altogether, this makes it perfect to grow in any Texas garden, especially in our area.

Additionally, it is in the mint family along with other drought tolerant plants such as Salvia.  The flower is reminiscent of tiny snapdragon flowers and is rose-red to pink in color.  Although small in size, this flowering plant produces in abundance which makes up for its size and will hold its bloom  from late spring until early fall.

Pink Texas Skullcap has Thyme-like foliage and has a dense growth habit, remaining neat and compact.  It can, however, benefit and respond well to occasional shearing, which will prevent it from getting thin in the middle.  Use Pink Texas Skullcap for rock gardens, dry hillsides, xeriscaping, or even for container gardening.

This hardy plant grows as a perennial as well as an ornamental.  Being a perennial, it tends to grow best over several years (approximately 3 years and greater).  Due to how easy it is to grow in a variety of conditions, Pink Texas Skullcap is great for beginner gardeners and those that like low maintenance gardens.

Happy Gardening!!

Filed Under: Favorite Plants, Gardening, Newsletters

Wild Texas Grapes

July 30, 2015 by lheideman

WILD TEXAS GRAPES

By Christine Morgan, ND and Master Gardener

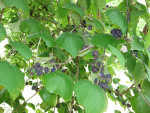
Here in Texas, there are two main types of wild grapes. Many people think all wild grapes are the same, but that isn’t true. The important thing to know is that most parts of these two grape plants…the tendrils, leaves, and fruit are edible.

Muscadine leaves

Muscadine leaves

The first is the Muscadine grape. It has a solid leaf shape that ends in a point with a few ridges around the edges. Its scientific name is Vitis rotundiflora.

It ripens in August to September and is usually in East Texas. The leaves are used in vegetable fermenting and to make dolmas (stuffed grape leaves) and other dishes with grape leaves. The fruit makes jelly or jam. They are slightly sweeter that Mustang grapes.

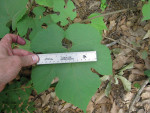
Mustang leaves

Mustang leaves

The second is the Mustang grape. The shape of its leaf looks like three fat fingers and a hand, but more correctly called a 3 lobed leaf. As the leaf matures through the summer, it fills

Muscadine leaves

Mustang leaves

in and looks much like other grape leaves. Also it is white underneath and somewhat fuzzy looking unlike the Muscadine leaf. Its scientific name is Vitis mustangensis. It ripens in Mid-July. Mine ripened on the dot this year, July 15th. Mustang grapes are quite acid

Mustang Grapes

Mustang Leaves

and may make your hands itch or burn for a while after handling. I use small pruners to clip the grapes and a little stem from the vines with no problem. After washing and preparing is when they might bite you a bit. No worries…it goes away with soap and coconut oil rubbed in to your hands.

To store:

I fill my sink with cold water and 2 capfuls of a vegetable wash called FIT. Let them soak a few minutes to make sure there is no highway, pesticide or dirt junk on them. Rinse thoroughly. Next, I pull the stems off from the grapes. If you only want juice to make jelly, you can leave them on. If I’m not making jelly-jam now (because I’m too tired and hot from picking), I put them in gallon bags and freeze them for another day. FYI- they do not do well at room temperature or even refrigerated for more than a day, and even then you can tell they are changing, hence why I pick, clean, and freeze them.

Here is my recipe for Mustang grape jelly/jam… It is really a cross between jelly and jam.


Mustang Jelly-Jam

4-5 cups juice and pulp

1 box Sure-Gel pectin

½ teaspoon unsalted butter

7 cups organic sugar

Hot, sterilized 4 oz. or 8 oz. jelly jars, with lids and rings.

Prep work:

Clean and fill water bath canner with empty jars, lids and rings. Bring to boil and simmer for 10 minutes; then turn off heat and leave lid on to stay warm.


Make the juice:

  1. Put fresh or frozen grapes (1-2 gallon Ziploc bags) in large stockpot with 1 cup of water. Bring them to a simmer. I look for no solid grapes in pot to know if they are done (about 20 minutes). Turn off heat and let sit for 20 minutes.
  2. Strain the juice and pulp through a mesh strainer or metal colander into a large bowl. Taste and if extremely acid, add 1 teaspoon of baking soda.
  3. Wash your stock pot and dry, or use another one if you have it.


Makin’ Jelly-Jam:

  1. Remove jars, lids, and rings and dry. Leave jars upside down until time to fill them on clean towel. Leave water in canner.
  2. Measure 4-5 cups of juice/pulp into a stockpot. Add ½ t. butter and 1 box of Sure-Gel and bring to boil. Add 7 cups of sugar and bring to rolling boil…boil for 1 minute exactly after it starts a rolling boil (I use a timer). TURN OFF gas heat or move to another burner if you have an electric stove. Note: Do not try to double this recipe, it won’t work. Instead make it batch by batch if you are swimming in grape juice.
  3. Use canning ladle to fill jars, leaving ½ inch headspace. Fit with lids and rings and tighten.

Load water bath canner rack with jars. Lower into canner and add hot tap water if necessary to cover jars by 2 inches. Bring to a boil and simmer for 5 minutes on timer.

Remove to counter and let cool completely. Check lids for sealing. If it pops up and down…it’s not sealed. Refrigerate and use ASAP.

Label and store in pantry or give as gifts. Enjoy!


Sources: Texas A & M Agri-Life

Ball Canning guide 2014

www.foragingtexas.com


Filed Under: Favorite Plants, Gardening, Newsletters

The Gardener and the Herb Patch

July 30, 2015 by lheideman

By Mary Anne Steele, Somervell County Master Gardener Intern

The gardener and the herb patch – one of the most easy-going and rewarding relationships you will ever have.  Herbs make few demands:  average soil, a little mulch, and some sun.  Other than planting each year, annual herbs need little more.  Tender perennials even come inside with you for the winter, asking only for a place away from direct heat, some indirect light, and a little water.

Basil and Green onions

Basil and Green onions

An herb garden is a source of pleasure during all four seasons.  During spring and summer, herbs respond to stroking by releasing lovely fragrances.  Some add flavor to foods, others repel insects.  Some blooms are edible.  In late summer to fall, you get the pleasure of harvesting and preserving your herbs, and in winter you get to play with them.  It’s not necessary to use or make something from your herbs.  You can just grow and enjoy them right in your garden.

You can fix your bed in the fall and wait until spring to plant, or create it and plant right away.  If you set out purchased plants rather than grow all your herbs from seed, you can enjoy your new herb garden instantly, and you will have herbs to harvest more quickly.  An area roughly 4’ x 8’ won’t take a lot of ingredients, but will give you room to grow several different herbs.

After planting, herbs need only minimum care.  Mulch soon after planting and keep adding more mulch throughout the season as the organic matter breaks down.  If you choose to harvest some for cooking, do so around midday when any dew has dried off.  If you have a generous harvest you may want to dry some for winter use.  Put trimmings in a paper bag, then hang in a warm, airy place.  The bag draws the moisture out, speeds drying, and keeps them from getting dusty.  Freezing is another way to preserve many herbs.

Source:  Patricia Lantz, Lasagna Gardening

Filed Under: Gardening, Newsletters

Learning From Rookie Gardener Mistakes

July 1, 2015 by lheideman

by Jes-c French, Somervell County Master Gardener Intern

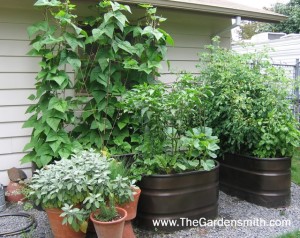
This was my first year to try vegetable gardening. Living somewhere without a yard of my own, I had a suspicion that the landlord wouldn’t appreciate my digging up their flawless landscaping. In a world full of apartments, however, I am far from alone in this struggle, and a quick look to the internet turned up endless articles and suggestions for people who want to garden but have no space. The most frequent recommendation I saw was to use containers for growing plants, and that is just what I decided to do.

container gardening

As I began researching, I attempted to take the things I learned about gardening in general and apply them to container gardening. I quickly found that a good plan is crucial before you even start the physical gardening. According to Joseph Masabni and Patrick Lillard, “Planning includes selecting the garden location; deciding on the size of the garden; determining the types and varieties of vegetables to plant; and planning where, when, and how much of each vegetable to plant in the garden.”

Being a first time gardener, I spent a great deal of time on the planning phase, and now that I’ve made it through my first harvest I have a few ideas of my own for future plans. When I picked out containers for my garden early this year, I ended up with a variety of sizes. One container in particular was too large for me to move once it was full. When this spring brought seemingly unending rain, I could take advantage of the fact that most of my garden was portable. In the future, I will probably do away with the oversized container and stick to ones that can be moved. After all, with all the unpredictable variables in gardening, why not take advantage of having a little extra control over how much rain my plants are getting?

I’m almost embarrassed to admit the other big thing I learned the hard way, because it seems so obvious now. With many days of rain, I obviously wasn’t watering the vegetables as often. Several days could go by without my bothering to check on the garden, and while its water needs were being met, its other needs were not. It was during those times that caterpillars took over and also that I missed out on harvesting some of the vegetables that were ready to be eaten. In the future, even if I’m not going out to water, I’ll make a point to check on the garden, addressing any pest concerns and picking vegetables that are ready.

Reference:   http://aggie-horticulture.tamu.edu/vegetable/files/2010/10/E-289_planning.pdf,

Filed Under: Gardening, Newsletters

Preparing For A Fall Garden

July 1, 2015 by lheideman

by Zachary A. Davis, Somervell County AgriLife Extension Agent

Glen Rose – Believe it or not!  Fall Gardening season is just around the corner. For some of us that procrastinated with a Spring Garden this is your chance to get your green thumb going again.

If your spring garden was productive, the same location should work. If this is your first garden remember plants need 8 hours of direct sunlight. While preparing a new garden kill all the grass in the area with roundup, remove the grass and shovel area to 10-12 inches deep, then till.

Fall crops generally do better when beginning from transplants versus seed. The idea when establishing transplants in late summer is giving them plenty of water. Check soil moisture by forming a ball, if you can do that you’re in good shape with moisture.

Planting at the proper time is an important aspect of fall gardening. Glen Rose, TX is in Texas Gardening zone III if you choose to do further research. Some plants you could plant soon include:

Vegetables Some Texas Varieties Plant Date
Eggplant Black Beauty, California White, Early Long Purple Jul 1
Pepper Bell: Camelot, Jupiter Hot: Jalapeno Jul 1
Tomato Small: Cherry Grande, Gold Nugget Medium: Amelia, Better bush Jul 1
Pumpkin Medium: Bumpkin, Howden, Jack O’Lantern Aug 1
Southern Peas Texas Pink Eye, California #5, Mississippi Silver Aug 1
Winter Squash Butternut types, cushaw, Royal Aug 10
Lima Bean Henderson Bush, Jackson Wonder, King of the Garden Aug 20
Sweet Corn Kandy korn, silver queen Aug 20
Broccoli Green magic, packman, premium crop Sept 1
Brussels Sprouts Sept 1
Cabbage Bravo, Market Prize, Rio Verde Sept 1
Cauliflower Snow Crown, Snowball Y Improved Sept 1
Cucumber Slicer: Dasher II Sweet Slice Pickling: Calypso Sept 1
Potato Norland, Purple Viking, Beauregard, Jewel Sept 1

Table 1.  Planting dates are specific for Texas Gardening Zone III. Varieties are examples, but consider contacting your local master gardener for information specific to Glen Rose, TX

Garden Problems

Any garden can have many problems including diseases, poor yield, and sunscald can result from improper watering habits. Watering can be enjoyable but it is important to do it correctly. Water thoroughly, soaking soil to 6 inches in depth when needed. This will help root development of the plants.  In Texas water applied once or twice a week for depth of 1-2 inches should be enough for most gardens. When determining to water, examine the soil, not the plants to see where you are at. If soil is dry at a depth of 1 inch it is time to water.

Insect and disease problems usually arise in gardens. It is important to identify the cause and correct it. It is important to protect your plants ahead of these problems. Spraying a pesticide labeled for garden use can be beneficial. Be sure to read the label before you spray.

Nematodes can be a common garden problem. Symptoms of nematode damage cause plants to look wilted or stunted, have pale green leaves and produce less yield. Infected roots swell and form knots as well. In fall gardens, solarize and pasteurize the soil in July by tilling it well and watering until it is very moist, then cover with clear plastic. Seal the edges and leave it in place for at least a month. Do not use black plastic because it won’t get soil hot enough. This process will help control nematodes, fungi, and weeds.

Harvesting

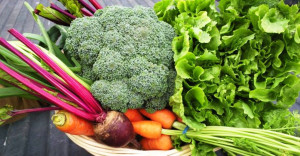
VeggiesPic2 Harvesting at the optimum time will help your garden.  Harvest broccoli when they are 4-8 inches in diameter, cut  the stalk below the head, leaving 8-10 inches of stem and      leaves, chill immediately. For Brussel sprouts watch for  harvesting around 3 -3.5 months after transplant. The first  harvest should occur before the lower leaves begin to turn  yellow. Break off the leaf below the sprout and remove the sprout by breaking it from the stalk.  Harvest cabbage when the head becomes solid and the top and sides cannot be pressed in. Mature heads often split open, you can delay harvest by twisting the plant and breaking several roots to lower water intake.

Harvesting cauliflower is similar to broccoli with heads being between 4-8 inches in diameter. The yellow color of cauliflower is the exposure to sunlight. Cucumbers are harvested when they are bright, firm, and green, but not too large. 1 -2 in diameter is an ideal size. Do not store cucumbers in the refrigerator for more than two days. It is best to pickle them the same day they’re picked. Peppers can be harvested at 4-5 inches in length, wash and chill peppers immediately to keep them from drying out. Tomatoes can be harvested in pink stage and can be allowed to ripen in a warm area of the house. This can prevent damage from insects and birds.

For additional information on fall planting and harvesting, contact Zach Davis, AgriLife Extension agent in Somervell County 254.897.2809.

Educational programs of the Texas A&M AgriLife Extension Service are open to all people without regard to race, color, sex, religion, national origin, age, disability, genetic information, or veteran status. The Texas A&M University System, U.S. Department of Agriculture, and the County Commissioners Courts of Texas Cooperating

Filed Under: Gardening, Newsletters

The Garden Herb – Parsley

May 30, 2015 by lheideman

by Sheryl Kleinschmidt, Somervell County Master Gardener

Swallowtail Butterfly caterpillar on parsley

Swallowtail Butterfly caterpillar on parsley

If you were around in the sixties, you are most likely  familiar with Simon & Garfunkel’s folksy tune, “Parsley,  Sage, Rosemary and Thyme”.  My eldest brother thinks  this is an actual recipe and won’t grill a steak without  these four ingredients!

I’m not a fan of sage, rosemary and thyme as spices, but  parsley is at the top of my “must have” herbs in the  garden.  Late last fall I was concerned that my parsley would not survive the winter and divided my plant into two parts.  One part stayed in the herb garden on the south side of the house and the other I put into a pot and brought inside.

This particular plant is the curly variety and was very healthy at the time it was divided.  At the onset of winter, the outdoor parsley waned a bit and I assumed it would eventually succumb to the elements.  The indoor pot was alive but turning yellowish even though it was in a sunny window.

Much to my surprise, though, even after a snowfall, the outdoor parsley remained green and did not die.  When spring finally did arrive, that little plant jumped into action and thrived.  It has now sent up several long stems which have greenish/white flowers on them.  My research tells me that after the seeds mature, the plant generally dies.  I’m going to miss my parsley, but intend to plant the seeds.

These two plants have generated enough leaves for all my culinary usage for almost two years now.  I especially like the flavor in soups, stews and chicken recipes.

Information from Wikipedia says that garden parsley (Petroselinum crispum) grows as a biennial.  In the first year, it grows numerous leaves and a taproot which it uses as food during the winter.  After flowering, as I’ve already stated, it generally dies.  In subtropical and tropical areas, it grows as an annual.

Parsley grows best in moist, well-drained soil in full sunlight.  It is happiest in mild temperatures (72-86 F).  It is a host plant for the swallowtail butterfly and bees are attracted to the flowers.  Finches enjoy the seeds.

Leaf parsley comes in flat-leaf as well as curly-leaf.  Flat-leaved (also called Italian) is a little more tolerant of weather conditions and has a stronger flavor.  It has also naturalized in some places such as England and Scotland where it grows on old walls and rocks.

Like many of our herbs, parsley originated in the Mediterranean countries and was brought to the Americas by our ancestors.  I, for one, am thankful.


Filed Under: Gardening, Newsletters

The Menace of Annual Bastard Cabbage

May 3, 2015 by Donna Hagar

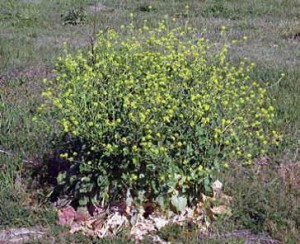
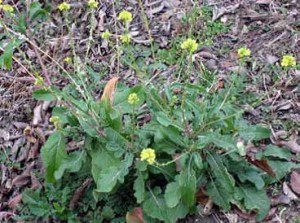
bastard cabbage1There once was a wonderful wildflower site near Aledo, Texas, along Iona road. It was a cattle-range field that I would drive past each spring to watch the glorious diversity of Texas wildflowers color the landscape in rainbows of bluebonnets and orange paintbrush, and a dozen other wildflowers all blooming in natural diversity.

One year I noticed stands of bright yellow pop up here and there – tall airy globes of yellow sparsely scattered in the acreage. The year after that the field was solid yellow; if there were other wildflowers, they were hidden under the onslaught of this one aggressive plant. While the kaleidoscope of Texas wildflowers normally run just a foot or two tall, in two short springs this field was taken over by Giant Mustard growing three to five feet tall and shading out all the native flowers.

It happened that fast, and it is happening all over Texas. Giant Mustard, Bastard Cabbage, Wild Turnip-weed — they are all the alter egos of the bully of the mustard family, Rapistrum rugosum, also known as RARU to the invasive plant hunters from its official USDA designated symbol.

bastard cabbage2This year has been especially splendid for the wildflowers, with huge stands of bluebonnets lining the roadsides. But in so many locales, the fields of deep blue are edged with tall borders of the airy yellow waist-high hedges of RARU. As the bluebonnets flourish, so do the invasives. However, the native bluebonnets disappear after their spring show. The RARU drops its seeds and develops a basal mat of dense leaves that out-competes native species and quickly forms a monoculture. With the ground well-mulched by the RARU rosettes, other seeds in the soil have no chance of germinating next year. The RARU wins.

What you can do

The easiest way to control RARU is simply to keep it mowed to prevent it making seeds. It is an annual plant which only lives one year; stopping the seeds from forming stops next year’s crop. If the stand of RARU has not spread too far, you can also remove the entire plant, including the tap root, to control it. In the late fall or early winter, the rosettes can be sprayed with herbicides. (Always use herbicides only according to directions.) Once the RARU is removed or killed in fall, over-seed with natives. Gaillardia/Indian Blanket is an especially a good choice for over-seeding against RARU.

If left uncontrolled, RARU spreads fast and far. Wherever the ground is disturbed, by new construction or wildfires, drought-stricken fields or parched lawns, road construction or laying new pipes, RARU seeds will take hold and block native grasses or flowers from germinating to fill the void.

We should all be on the lookout for this noxious plant and do what we can to eradicate it!

Source: Excerpts taken from an article published by NPSOT Invasive Crowds Out Wildflowers by Marilyn Sallee  We should all be on the lookout for this noxious plant and do what we can to eradicate it!


Filed Under: Gardening, Newsletters

  • « Go to Previous Page
  • Page 1
  • Page 2
  • Page 3
  • Page 4
  • Page 5
  • Go to Next Page »

Upcoming Events

Jun 18
10:00 am - 11:30 am Event Series

SCMG Monthly Business Meeting

Jul 16
10:00 am - 11:30 am Event Series

SCMG Monthly Business Meeting

Aug 20
10:00 am - 11:30 am Event Series

SCMG Monthly Business Meeting

Sep 17
10:00 am - 11:30 am Event Series

SCMG Monthly Business Meeting

Sep 20
10:00 am - 11:00 am

SCMG Public Education Event – TBA

View Calendar

Get Updates

Subscribe to Our Newsletter

RSS Recent Posts

  • Public Education Event
  • Azo-What?
  • Pop Up Plant Sale 2025
  • Plant Sale and Raffle

Administrator Only

  • Log in
  • Entries feed
  • Comments feed
  • WordPress.org
Texas A&M AgriLife Extension Service
Texas A&M University System Member
  • Compact with Texans
  • Privacy and Security
  • Accessibility Policy
  • State Link Policy
  • Statewide Search
  • Veterans Benefits
  • Military Families
  • Risk, Fraud & Misconduct Hotline
  • Texas Homeland Security
  • Texas Veterans Portal
  • Equal Opportunity
  • Open Records/Public Information